7 tricks of After Effects Part II
Keyboard shortcuts
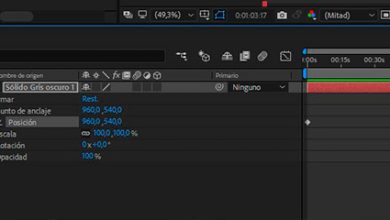
You no longer need to go to each layer dropdown and choose “Transform” every time you need to scale, move or play with the opacity of an object. You just have to click on the layer you want to modify and press one of the following letters, depending on what you want to do. Take good note:
- Press the letter “T” of your keyboard, it will open the “Opacity” tab to give more or less transparency to that layer with which you are working.
- The “S” key It will allow you to scale, that is, give or reduce the size of the element that you have placed on that layer.
- If you press the “P” key you can change the position of the object on the screen. It is true that it is faster to drag it directly and place it where you want. But if you want to align and control the elements very well, we recommend you take a look at the coordinates provided by the tool itself.
- The letter “R” It will allow you to rotate objects based on degrees, but you will also be able to write down the number of turns.
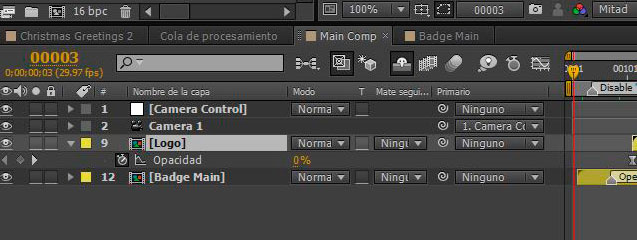
- If you have made many Keyframes and want to see them all at once, press the “U” key. This way you save yourself having to go layer by layer.
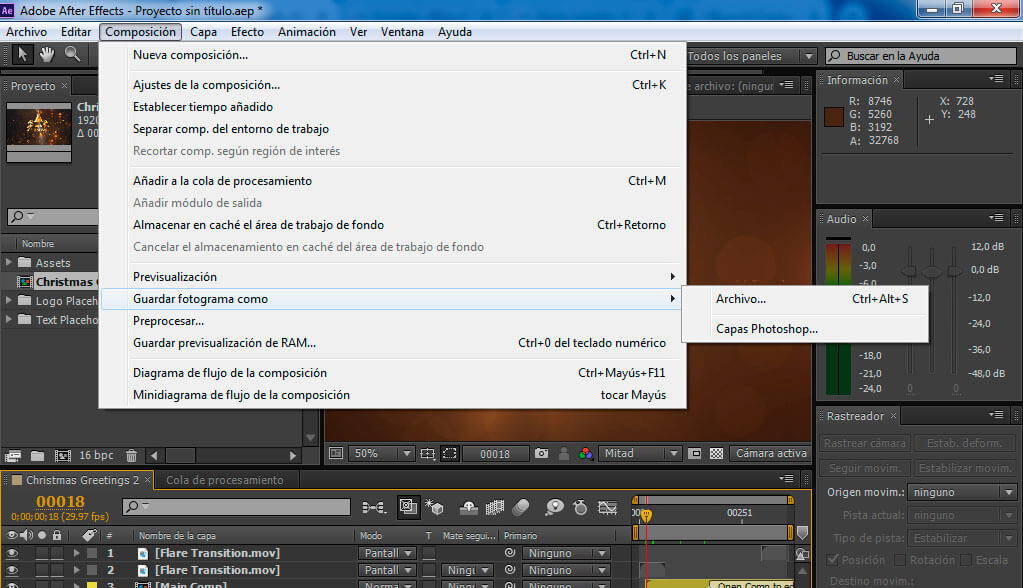
How to save a frame
Sometimes we need a video frame to make the YouTube thumbnail, for example. Although this operation is easier in Adobe Premiere, since you scroll in the video timeline. You place the exact frame of the one that interests you the most. In the preview itself you will see that at the bottom there is a camera. You just have to click on the icon and you will take a photo of that frame. Easy, right?
In After Effects we can also do it. To do this you have to go to the top menu go to Composition> Save frame as… and here we have the option to save it as a file or as Photoshop layers. Interesting, right?
Did you find these tricks useful? Do you want to learn how to use these tools professionally?