Keyframes and their importance in After Effects
Keyframes, also called keyframes, are the basis of animation in After Effects. Aside from the timeline, the keyframe is the most important animation tool in After Effects.
Defining the keyframes
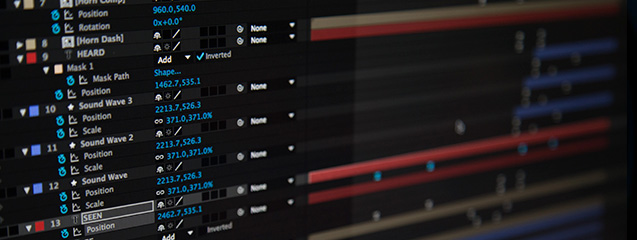
Keyframes are markers in time that let you tell After Effects where you want to change the value of a layer or effect property, such as position, opacity, scale, rotation, amount, particle count, color, and so on. By setting these “markers” and changing the values you create animation.
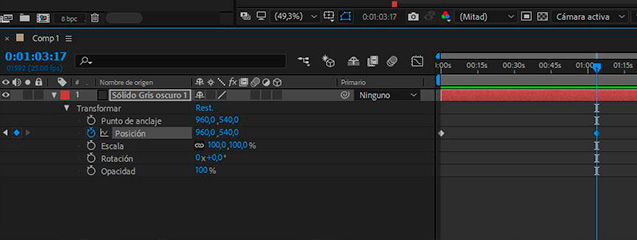
Every project you do in After Effects is going to have a timeline. It is on this line that keyframes are added to create motion. The keyframes are configured in the Timeline panel, there we will indicate where our animation will start and where it will end.
This is where the importance lies, since the keyframe is used in all kinds of properties and effects. They will not only allow us to move an object from one side to the other, rotate it or change its opacity. In any type of effect that we are going to use, we are going to need these keyframes.
How to set keyframes in After Effects
Now that we know what they are and why they’re important, it’s time to learn how to use them in After Effects. The first step will be to place ourselves in the timeline where we want the animation to start. We will choose the property that we want to change (position, opacity, rotation) and press the stopwatch or clock. Then we will move on the timeline to the minute or second that we want that animation or effect to last, we will adjust the value and another keyframe is automatically generated.
In order for that second keyframe to be formed, you only have to modify the position, rotation, opacity values or the chosen effect. Remember that if you press the little clock again, you will erase all the work done on the animation of that object!!
It is also important to know that you can select several keyframes at once by selecting rectangles or by clicking on them individually. We will see that they change to a yellow color. Thus, we can move the set or speed up and slow down the animation by redistributing them by dragging one from the end of the selection with Alt pressed.
On the other hand, if we are interested in repeat the values of a keyframe, no need to do it again. We can use the command Ctrl+C to copy and paste them later or even to another layer with Ctrl+V. if we want remove the keyframe by selecting it and pressing the delete key, it will be deleted.
More features about keyframes
- Navigation. Keyframe navigation is very simple. Next to the clock there are some arrows that will allow us to move from one keyframe to another.
- Temporary interpolation. It will help us slow down or speed up the movement of the animation. This can be accelerated (beizer) or continuous (linear). Also, we must bear in mind that a keyframe will always have an input frame and an output frame. To modify it, we will only have to place ourselves in the frame and by clicking with the right button we will select the keyframe Assitant. Here we have three possibilities: Ease Ease (with which we will decelerate both when arriving at it and at the exit), Ease Ease in (only the arrival will decelerate) and Ease Ease out (the exit will be accelerated). But if instead of curved, we want to make a linear keyframe, we will click on it until it becomes a rhombus or right click and select Keyframe Interpolation/Temporal Interpolation.
- Spatial interpolation. With it we will describe the route that the objects in a layer must follow, that is, we will be animating their position in the layer. This can be linear or curved. To change the movement we can use the pen tool and draw the path to follow, as well as modify it once drawn. Although we can also use the Spatial Interpolation located in the Keyframe Interpolation, which we have seen before.
- Hold. It is another type of frame that will help us maintain. In this way, we will keep the value of the property constant until the next one, where it will adopt the new value without transition. For this we will use the Toogle Hold Keyframe. You will see that it takes the shape of a rectangle.