The Art of Drawing Hands

One of the biggest frustrations for us cartoonists is drawing a specific part of the body: the hands. But why do we usually have so much difficulty? I think one of the reasons is because the hands involve a lot of three-dimensionality. Also, since they are not as interesting to draw as a face, we don’t pay as much attention to learning how to draw them properly. Therefore, in this article, we are going to see how the anatomy of the hands works, and I will give you some tips that will make your life easier when drawing them.
Before we start, let me convince you that drawing hands correctly can be not only important to get a good result in your drawing, but also quite entertaining.
First of all, the hands are very versatile, and can be drawn in many different ways. There is no greater waste of potential in a drawing than when the artist chooses to put the hands in the character’s pockets, or behind her back.
This incredible part of the body is not only used to hold the most diverse objects, but can also add drama and personality to the character, in addition to containing its own expressiveness.
I can guarantee you that, although they are a bit complex to draw, it is worth investing time in learning how the hands work, and how we can play with them in a way that we can enjoy their full potential.
How does the anatomy of the hands work?
The anatomy of the hands may seem difficult, therefore, let’s understand it in parts:
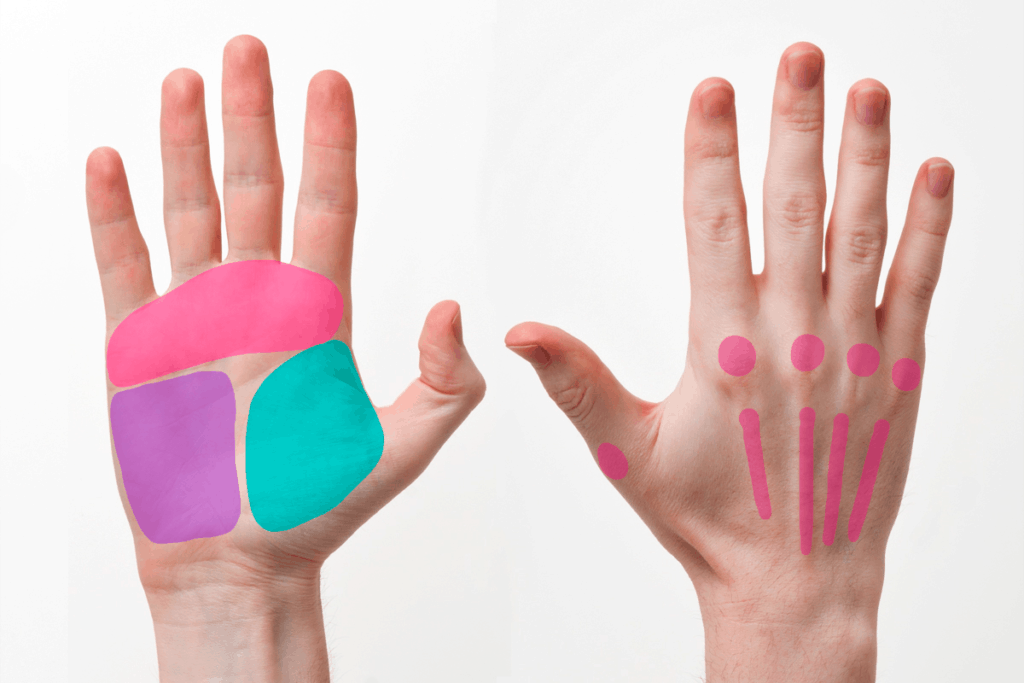
Let’s start with the palms. In them, we have three very important muscles: the thenar (in blue), the hypothenar (in purple) and the base of the fingers (in pink). The entire structure of the hand will depend on these muscles. Knowing these three parts is essential, because they are the ones that are tensed or lengthened according to the position of the hands.
On the back, the parts we need to look at are the knuckles, which can be drawn with curved lines, and the tendons, which can be drawn with straight lines. Whether or not to draw them will determine how realistic your drawing is, and can also give it a more aggressive feel.

The fingers consist of three parts of equal sizes. Thumbs are exceptional in that they will only have two parts. Another curious thing about the thumbs is that their tips will always point a little behind, and a piece of their inner part will be seen from the back of the hand.
Something interesting to consider in relation to the fingers is that the middle and ring fingers are usually closer together than the others. So, don’t be afraid to draw them closer together, like in a nice friendly relationship.
Another thing to keep in mind is that drawing nails has become a stylistic choice, and it also depends on how much you want your drawing to look more realistic or not. You can do them completely, or just a line that represents them. Try and choose what you like best!

Something interesting in the hands is that the fingers always form a curve in relation to the palm. This curve will show up a bit higher in the back, but can still be seen.
The space between the fingers will always be curved. These spaces are necessary at the time of drawing, so that the fingers do not appear to be stuck together.
Lastly, between the wrist and the thumb line, the hand will normally have an “L” shape. You can confirm this by making poses with your hands.
Practical Tips for Drawing Hands
Now that you know the basics of hand anatomy, we can delve into tips to draw them in an easier, more practical and functional way.
Tip 1: Make the hands with simple shapes
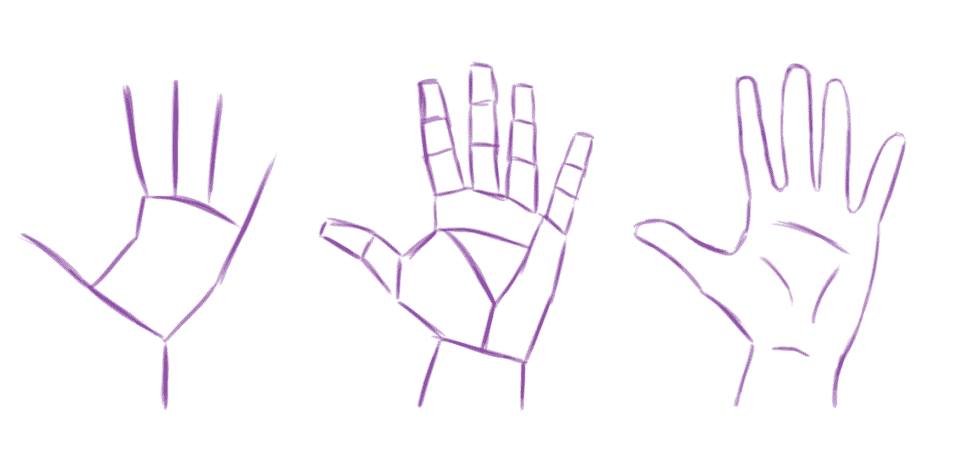
To find out if the structure of the hands you are drawing is correct, you can start with the basic lines of the fingers and the center. Then you can work with rectangles to understand where the structures go. Finally, you can erase everything that is not necessary and draw the details.
Tip 2: Draw the hands with triangular shapes

At the sketching stage, it is not good to do detailed drawings, as the goal is to draw shapes as simple as possible, as quickly as possible. At this moment, drawing hands with points and a triangular shape is ideal, because you will be able to see how expressive they are and how they will work in the drawing.
Tip 3: Start with circles
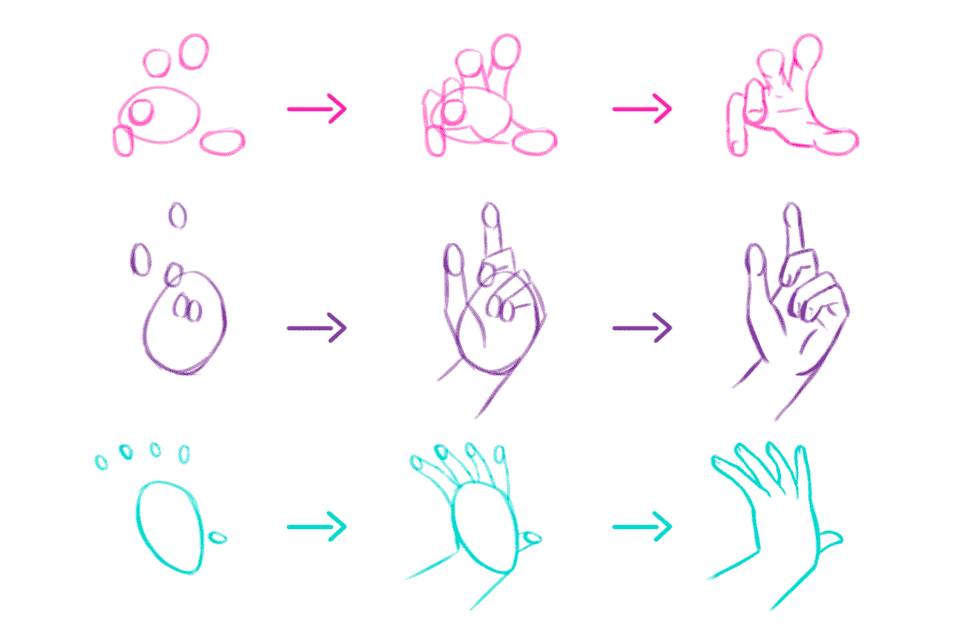
If the idea of making hands in perspective still overwhelms you, you can try making circles to represent where the palm and fingertips go, and from there make the missing shapes.
Drawing hands is not necessarily an easy task, but with practice, it can become a lot of fun. Now that you know what the anatomy of the hands looks like, don’t be afraid to experiment drawing them in different poses and perspectives, and experience the techniques seen in this article. If you like to learn more about anatomy,this Domestika course may be of interest to you! Don’t forget to use the code CHIBERIANOS-WAIFUS to get a 10% discount on the purchase of the course. And if you want to continue reading about anatomy, you can read the last article in this series! clicking here! 🙂