How to create an animated GIF with Photoshop and export it in HTML5?
Making an animated GIF with Photoshop is nowadays easier than ever. It is true that there are hundreds of pages on the Internet that allow us to create our own GIFs. The problem is that they have default and quite limited options in general in terms of editing and exporting. For this reason, today we are going to tell you how to make a GIF in Photoshop and how to export it to use it on our websites.
The first thing is to be clear about what we want to appear in our animated gif. For this one mini-tutorial, we will take as an example one of the GIFs that we have used in the BlogThinkBig.com. Once we are clear about what we want to appear, we create the content of the GIF. In this case, it will be a simple GIF, with four images created with Illustrator. And it is that, nowadays, making an animated GIF with Photoshop is easier than ever. It is true that there are hundreds of pages on the Internet that allow us to create our own GIFs, but they have default and quite limited options, generally, in terms of editing and exporting. Let’s go by parts.
We save the images in .png format. To do this, we go to the menu File>Export>Export As. We select the folder in which we want to save these files and check the box “Use artboards”so that elements that could have been left out of the work tables that we have used do not appear.

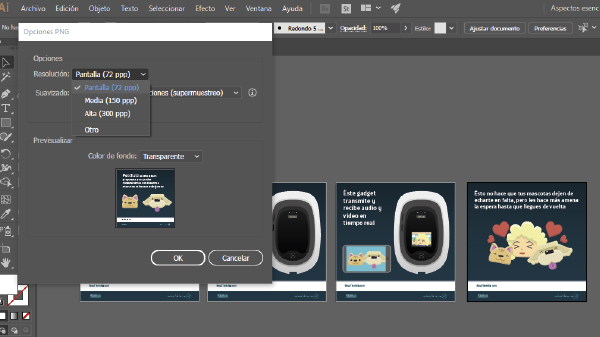
We accept and, after doing this, a small menu will appear called “PNG Options”. In the resolution section we select “Display (72dpi)”. For this GIF, in the anti-aliasing tab, we will select the “Optimized for Illustrations” option. The background color doesn’t matter in this case, since there are no transparencies.
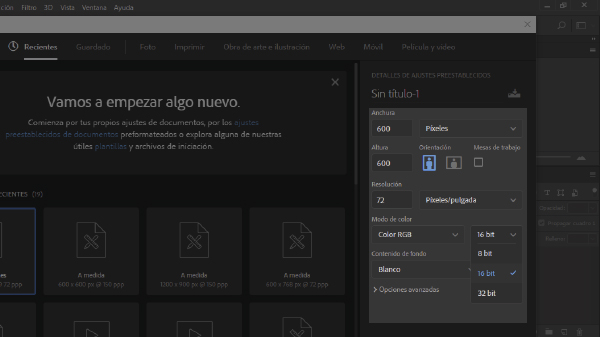
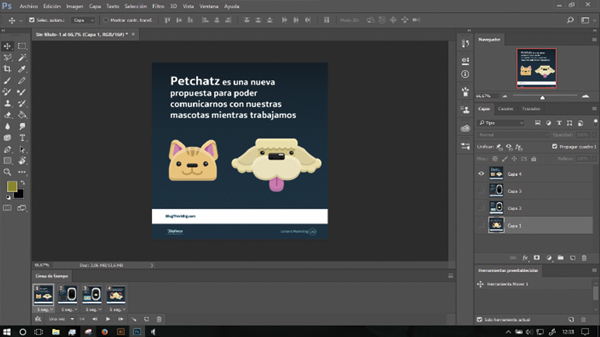
We already have our files in .png. The time has come to get down to work. We open Photoshop and create a new file. In this case, the size of the GIF will be 600×600 pixels, at a 72 pixels per inch resolution. We select this and not another because the resolution of the monitors is that, and putting a higher one would increase the weight of the final file without altering the result. Regarding the color depth, we can select one of 8 or 16 bit. If we select a depth of 32 bits, directly we will not be able to export the animation as GIFs.
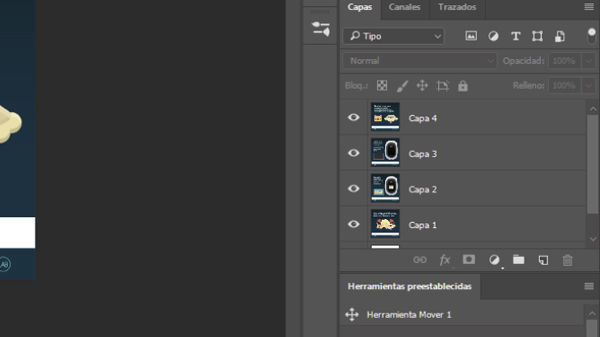
We already have our new Photoshop file. Now we import the images that we made before. Once imported to the Photoshop file, we place each on a different layer. For this GIF the order of the layers is not critical, but it is always recommended to be ordered with respect to Photoshop layers.
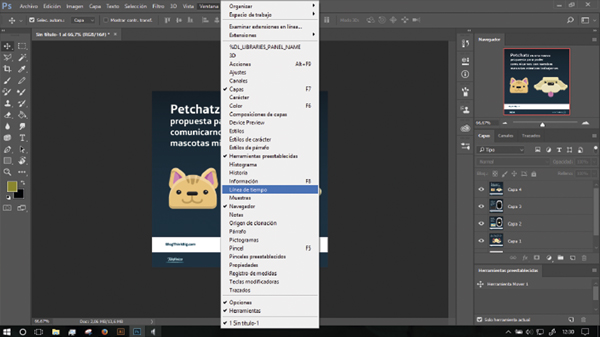
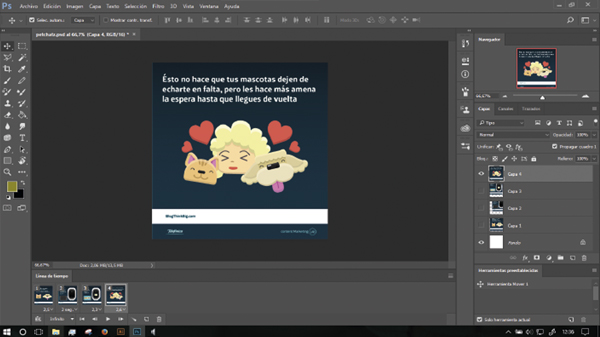
Once this is done, we will go to the top tab Window>Timeline. This will bring up the video editing bar at the bottom.

Within this new window another one will appear in which it will say “Create video timeline”. We click on the arrow that appears to its right and select “Create frame animation”. Now a small box should have appeared with the images we imported. For this GIF we will create three more frames, since we have four images to animate. To create more boxes, we go to the button to the left of the trash can icon and create the boxes we need. Once created, we click inside each one to show the layer we want in each one.
After this, we adjust the time we want each frame to appear. To do this, click on the bottom of the box, and select the time needed for each one. In addition, we will have to make it repeat infinitely. For this, at the bottom of the timeline we have a box in which “Once” appears by default. We click on it and change it to “Infinite”.
We already have our GIF made, and now we have to save it. To do this, we will go to File>Export>Save for Web (legacy).
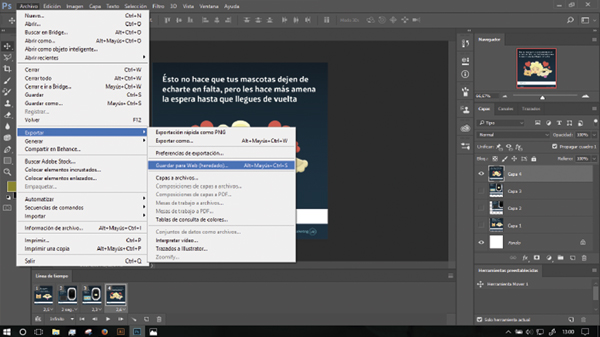
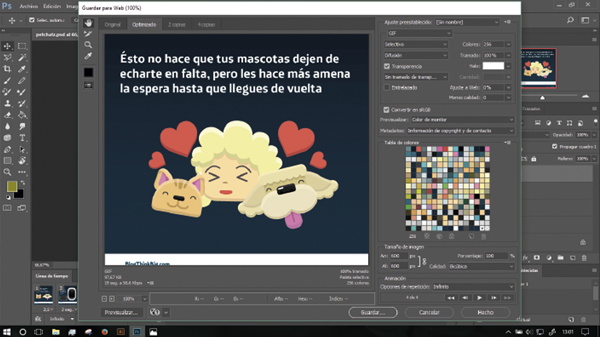
A window will appear with all the save options that we have. At the top we will have to select “GIF”. Below we have to verify that in the “Play Options” option is selected “Infinite”. Once these settings are as we want, click on the box “Save” and select the folder where we want to save our GIF. Then we click on “Done”And now we have it!
If we have done all these steps correctly, the resulting file will be in .gif format. If what we want is to play it in a browser, simply with drag it to the browser icon will play it. Another option is to right click on the file, select “Open with” and our browser.
To use it on websites we will need to upload it to a server first. One page we can use is Giphywhere we will upload the file and it will give us the option to take the HTML5 video code, the GIF link or an abbreviated link.