How to use layers in Procreate
welcome to you young man creativeLover of He drew or illustrator professional ! 😊 Today we are going to see how to use layers in Procreatethe leading drawing app for ipad.
Why use layers in Procreate?
The first question to ask is: but why? use layers in Procreate ?
Like its competitor Photoshop, Procreate works with different layerswhich allows you to divide your work into several parts.
But what interest exactly?
The advantage of separating your work into different layers is that you can make changes to one part of your work, without altering the rest.
- For example, you can choose to create a layer for the sketch.
- so you leave create a layer over to ink, in order to clean up your sketch.
- Finally, you’ll create a new layer for the color (which will be placed below the ink layer so that the color doesn’t cover it). If you need to erase the color, you will be able to do so without disturbing the line of your inking.
- Can add as many layers needed: one for shadows, one for highlights, one for matter, etc. !
Now that we have clarified this point, let us see how to use layers in Procreate.
How to use layers in Procreate?
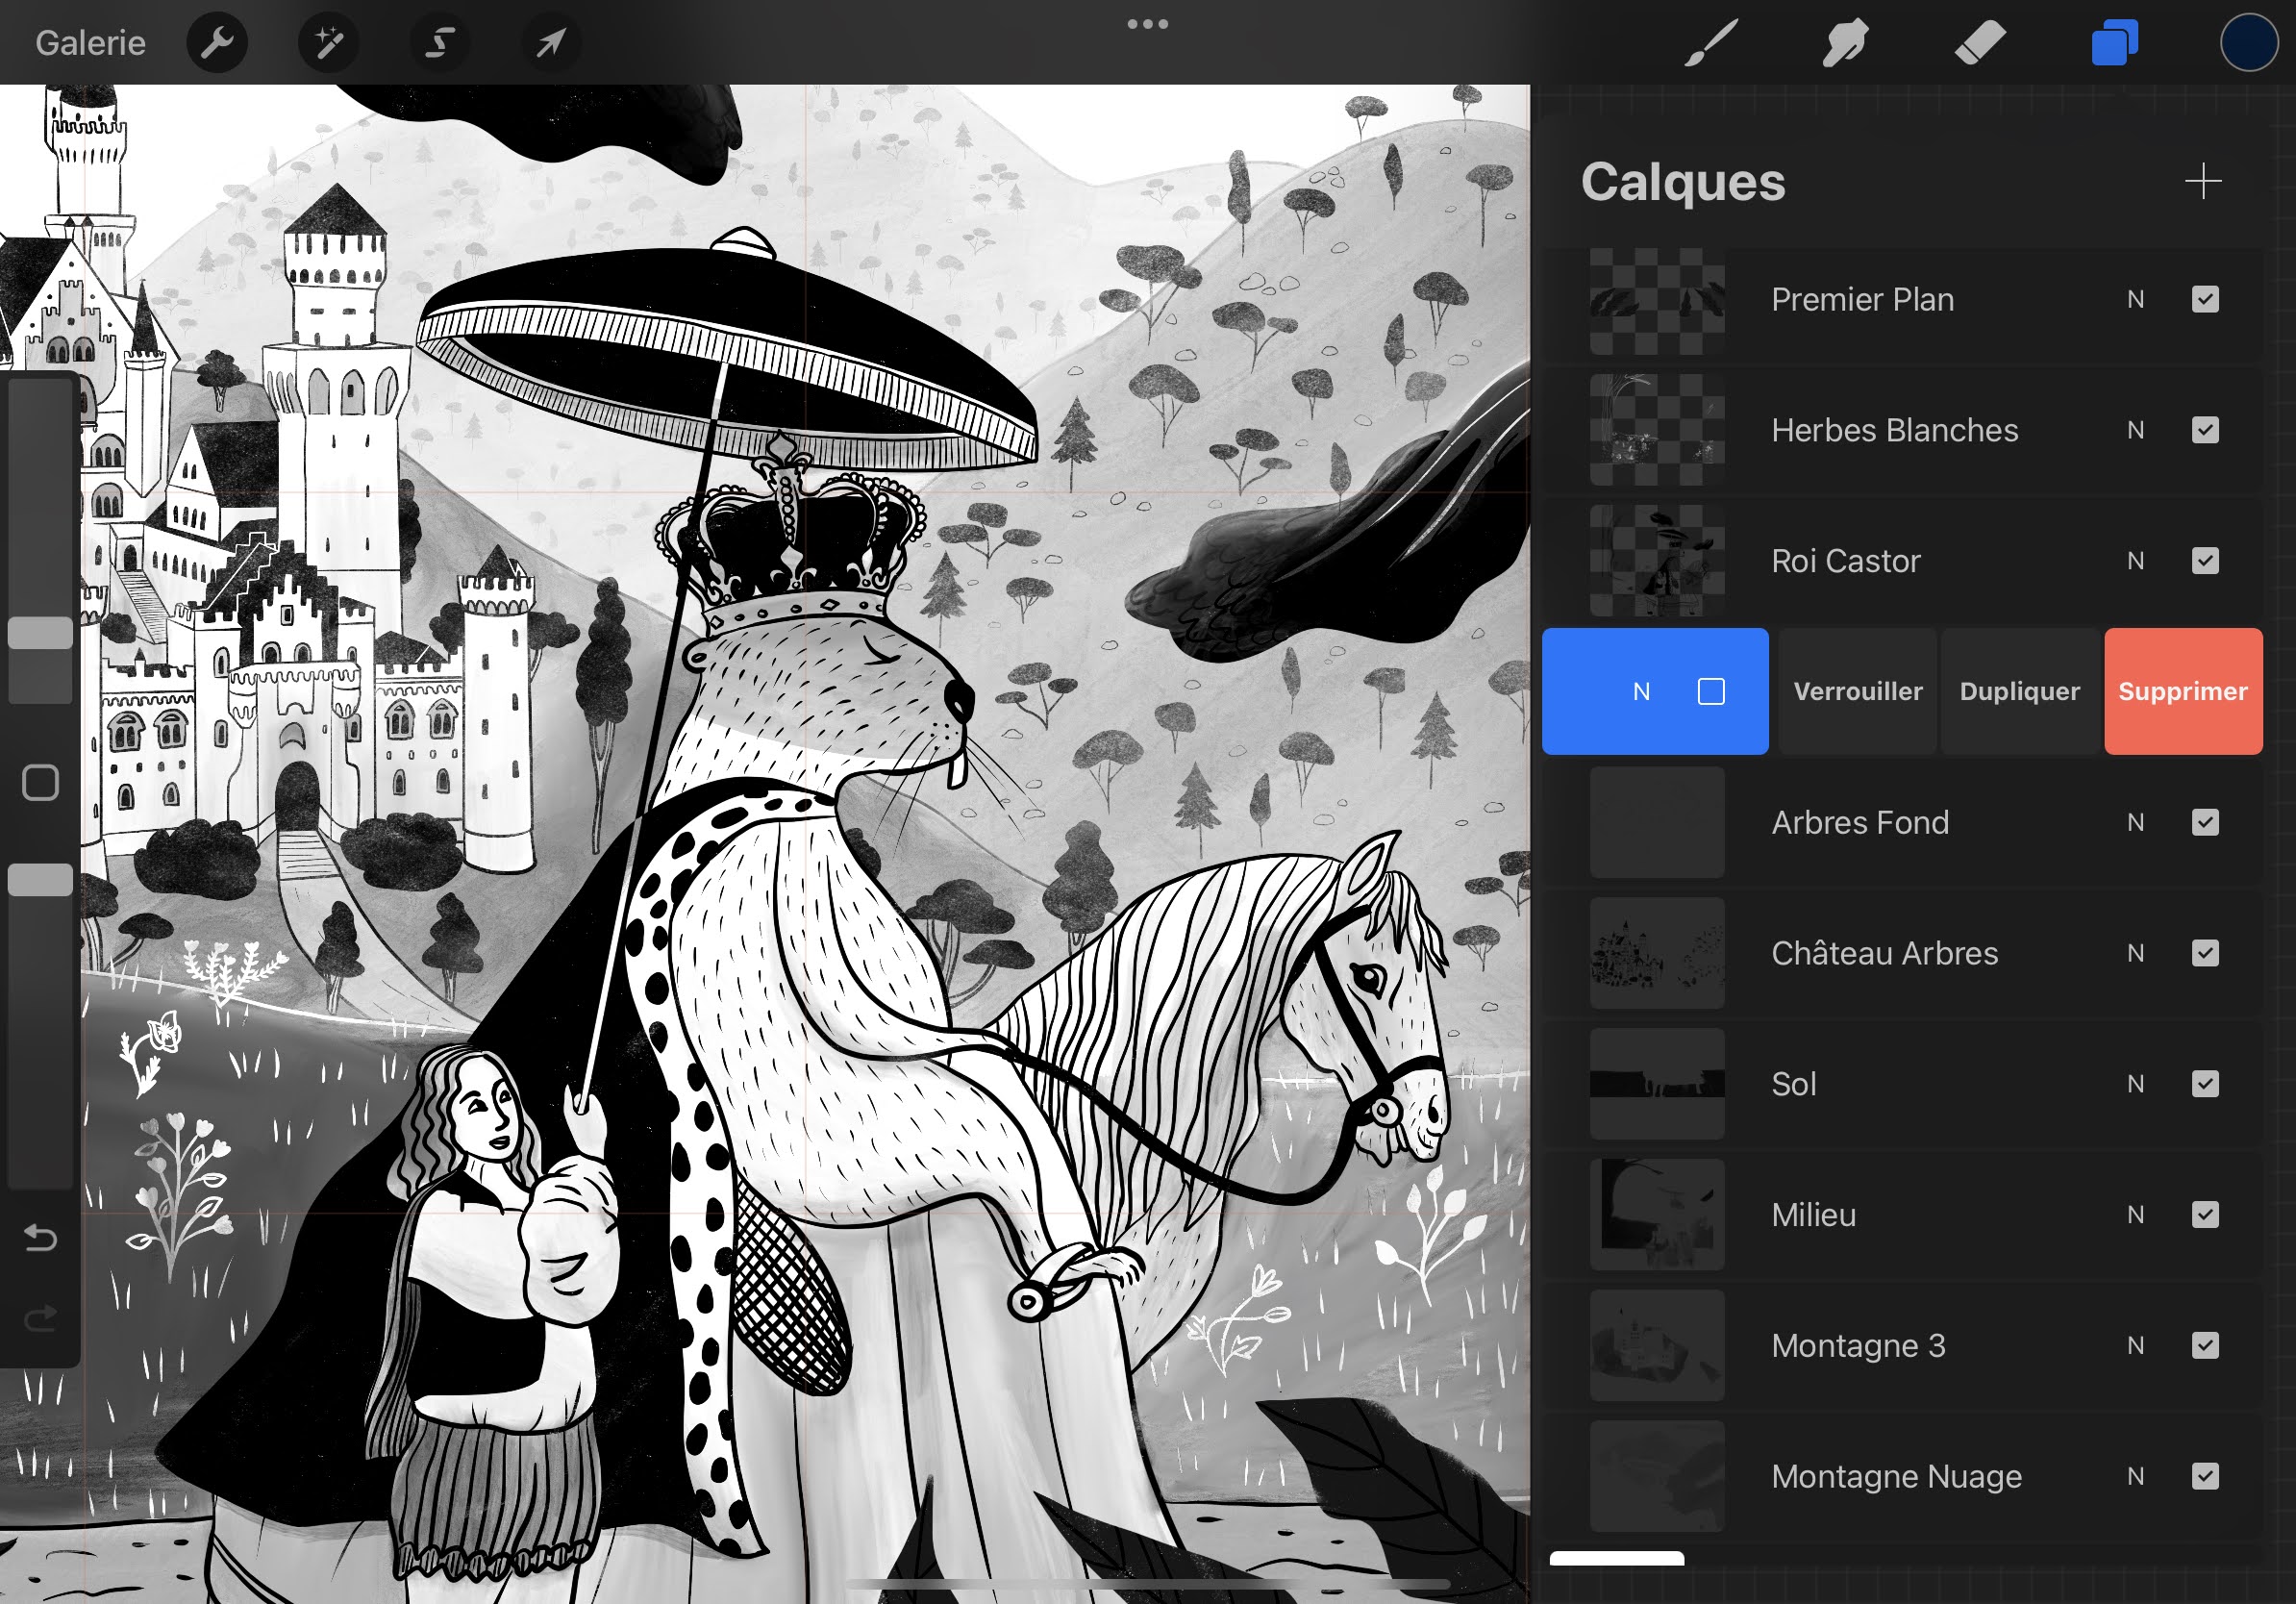
The layer stack in Procreate It’s in the top right of the screen, between the draft and the color palette. It is represented by a pictogram that forms two squares. Start by clicking this button to bring up the Layers pane.
- For create your first layer, just click the + at the top right of the Layers Panel. A new layer appears.
- can show and make your cape disappear by clicking the little checkbox on your layer.
- Can change the opacity of your layer clicking on the N and playing with the layer opacity wheel
- You can change its blending mode by clicking the N and scrolling through the list
- Can rename your layer clicking on it and then selecting Rename in the dialog that appears.
- Can flip your layersclicking a layer and holding the stylus over it as you move it.
- Can group layers sliding your finger to the right on each of them, then clicking the “group” button. I explain other methods to group layers in my dedicated article, “how to group layers in procreate”.
- Can combine multiple layers first by grouping them, then clicking on the group and selecting Flatten in the dialog that appears.
- Can lock a layer swiping left and selecting Block.
- Can Duplicate a layer in the same way
- Can fill a layer of the color currently selected in your color palette, by clicking on the layer and selecting “Fill Layer” in the dialog that appears
- Can create a clipping mask from a layer to another layer by clicking on it and selecting “Clipping Mask” in the dialog that appears. I explain what clipping masks are for and how to use them in my article “How to Make Clipping Masks in Procreate«
- Can color the content of your layer without exceeding it thanks to the Alpha Lock function that you can activate by dragging two fingers to the right on your layer (the background becomes square when the effect is activated) OR by clicking on the layer and selecting Alpha Lock in the dialog that appears.
- Can Clear layer content clicking it and selecting Delete in the dialog that appears
- Can remove a layer sliding your finger on it to the left and choosing Delete
save work
Don’t forget to save your work when you’re done, here’s my tutorial where I explain how.
Well, I hope this article was useful to you and now the layers have no secrets for you 😁