How to make a perspective grid in Procreate?

welcome to this new tutoriel to teach you how to use Procreate, the flagship software for IPad and for everyone drawing lovers. Today I answer your question: How to make a perspective grid in Procreate ?
Contents
How to make a perspective grid in Procreate?
The perspective grid is a very nifty tool that allows you to configure and view the leak points his He drewto draw perspective objects.
The the perspective gives the illusion of depthfrom dimension Yspace a 2D drawing.
Let’s take a closer look at that.
Activate drawing guide
First, go to the Action Panel at the top left of your screen (wrench). On the Canvas tab, turn on the Drawing Guide by clicking its button, and then click Edit Drawing Guide.
Create the perspective grid
From this new window, you can now choose from the different drawing guides available in Procreate. At the bottom, click Perspective. Now you can place your leak points necessary for your drawing, which draw your perspective grid.
Nothing could be simpler: press anywhere on your screen, the first vanishing point will appear. You can drag and drop it wherever you want in your drawing. Then repeat the operation with the other vanishing points, if you need them.
this is what my perspective grid with a vanishing Point in the middle. This is suitable if I want to draw an interior scene, for example where I am facing a wall.
Once you’re happy with your grid, click OK.
Draw using the perspective grid
Now you have two options: you can choose designer just following the perspective gridor you can activate the assisted drawing which will allow you to automatically follow the grid as you draw your traits.
I recommend that you activate the assisted drawing that will make your strokes much easier, on the other hand it will be necessary to deactivate it sometimes to erase and add strokes that do not follow your perspective grid. At any time, click on your layer and uncheck the “assisted drawing” option.
So I’m going to start with draw a rectanglethe mur which I am facing in this room. Then from each angle I will draw the traits du ceiling.
Now I’m going to draw a bed against the left wall, starting with the box spring, then the mattress, etc.
Next, I’ll add windows and doors to the walls, as well as some furniture.
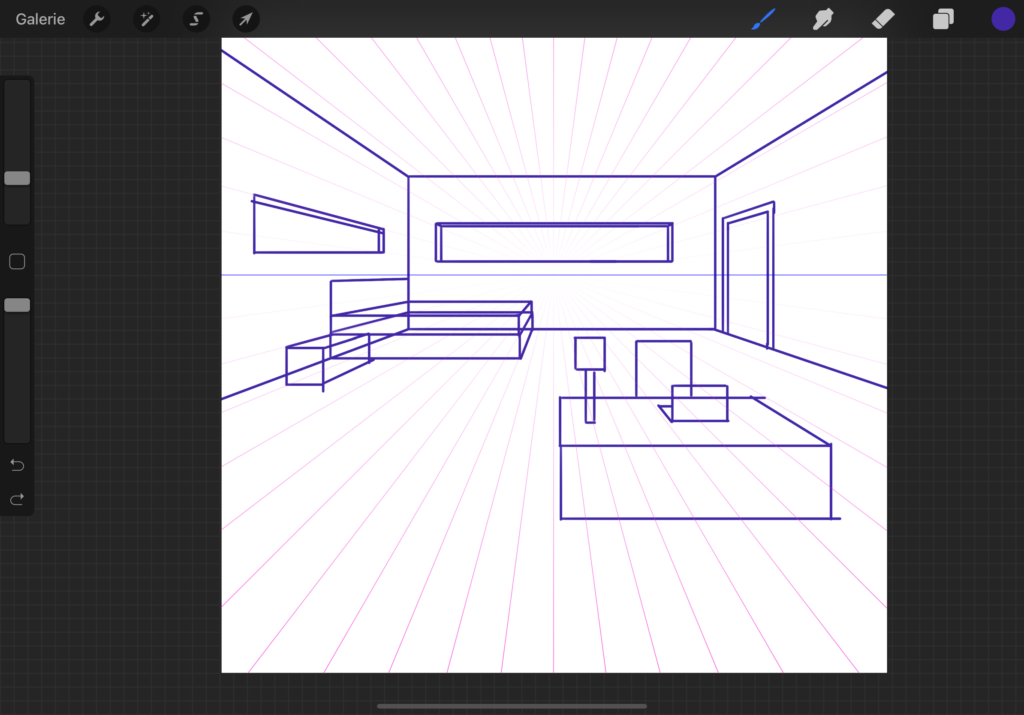
clean drawing
Once my elements are drawn, I disable the drawing assistant to erase the lines that should not appear in my drawing.

This drawing can be used as a tracing base to redraw the objects in a more organic and realistic way on a new layer.
Here! Now you know how to make a perspective grid.. Find more about ProcreateI invite you to consult my other articles on the subject!