How to make a clipping mask in Procreate?
This article is for everyone. illustrators and lovers of drawings who work at Procrear and who want to learn how to make a clipping mask !
To start, let’s see together what exactly it means when we talk about “clipping mask”.
Contents
What is a clipping mask?
You clipping mask is a very practical solution when you want color without going overor when you want to do color tests on an image without compromising the work already done.
The clipping mask is a great tool that allows you to display the content of one layer (a color, for example) within the content of another layer (a shape, for example).
Does it still seem vague to you? Let’s see in more detail (and in pictures!) how it looks…
How to make a clipping mask?
You just created your design and now you want to test couleurs to bring you more material and nuances for example.
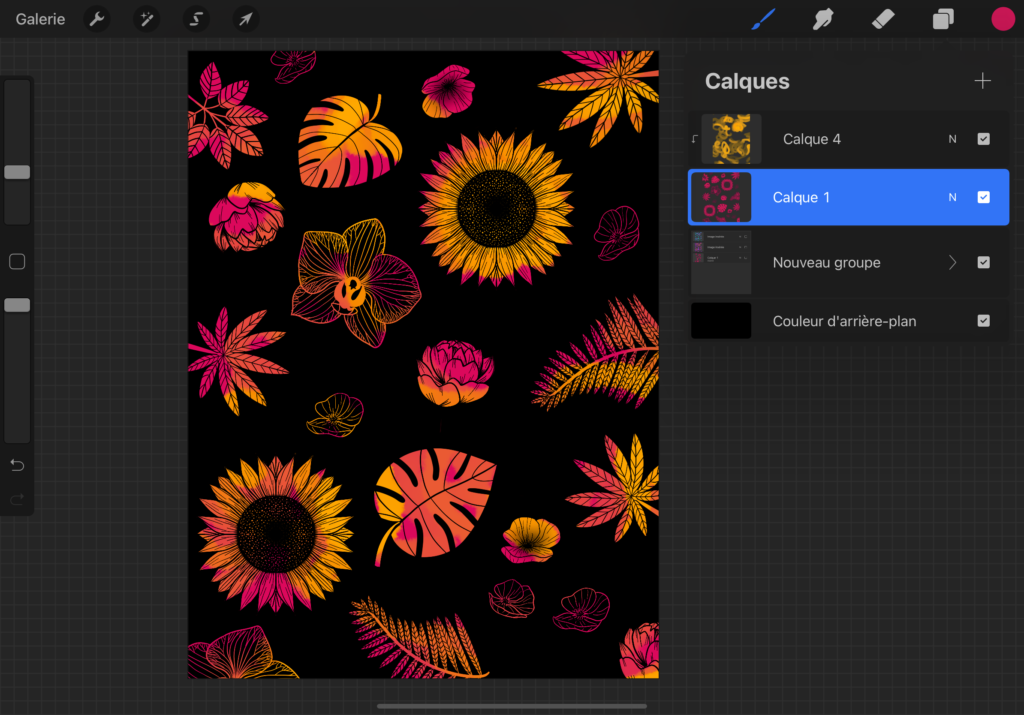
This is what my initial design looks like. We will call this layer “Shape Layer”.
of a colored layer
For example, I want to integrate yellow into my design to bring light to my floral motifs. Here’s how to make a clipping mask:
- Create a new layer above my “Shape Layer”
- Color this new layer with the the colors wanted
- Click on the layer: different options appear.
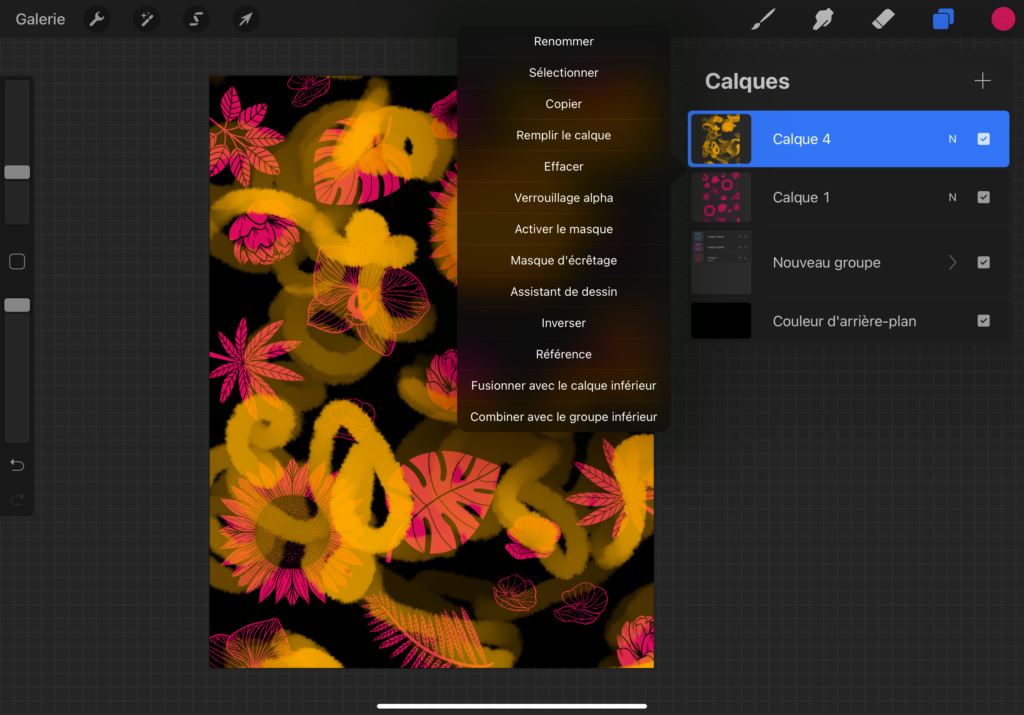
- Click on ” Clipping mask“. A small arrow indicates the creation of the clipping mask.
- The color is automatically integrated into the shape of my “Shape Layer”
As you can see, I scribbled all over my clipping mask, but only the shape of my design was colored in! My “Shape Layer” served as a template for the color.
However, it remains self-contained, so it doesn’t get damaged during my various color tests.
From an imported image
You also canInsert image in your clipping mask !
So importing an image into Procreate. A new layer is created – convert it to a clipping mask. This time I’ll try it with a gold leaf photo.
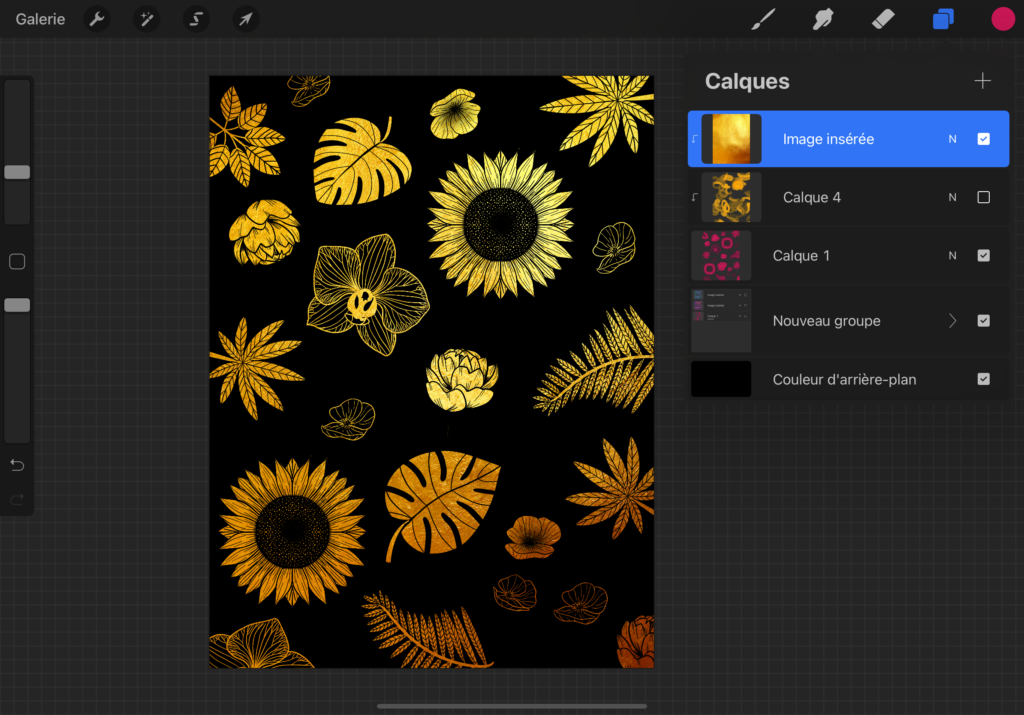
And here is the result! Isn’t this tool amazing? 😀
Now that you understand how create a clipping mask in Procreate, a whole world awaits you! Your creativity will only multiply by ten 🙂
When you finish your illustration, remember to save your work in Procreate.
And if you want to learn more about Procreate, feel free to check out my other articles on the subject,