How to create a brush in Procreate?
are you working on Procreatethe first application drawing for iPadand you want to learn create a brush. First of all, to understand how the Brushes panel works, I invite you to read my article on How to customize a brush in Procreate.
Contents
Discovering the brush panel in Procreate
The brush library
The brush library can be accessed from the pictogram in the form of brush in the upper right corner of your screen.
The Brushes are stored in different directories, depending on what you want to use them for: some are more suitable for featureothers in Colorant.
You can create a new directory by clicking the blue + button at the top of your directory. Thus, you will be able to store the brushes that you are going to create in a specific directory for you.
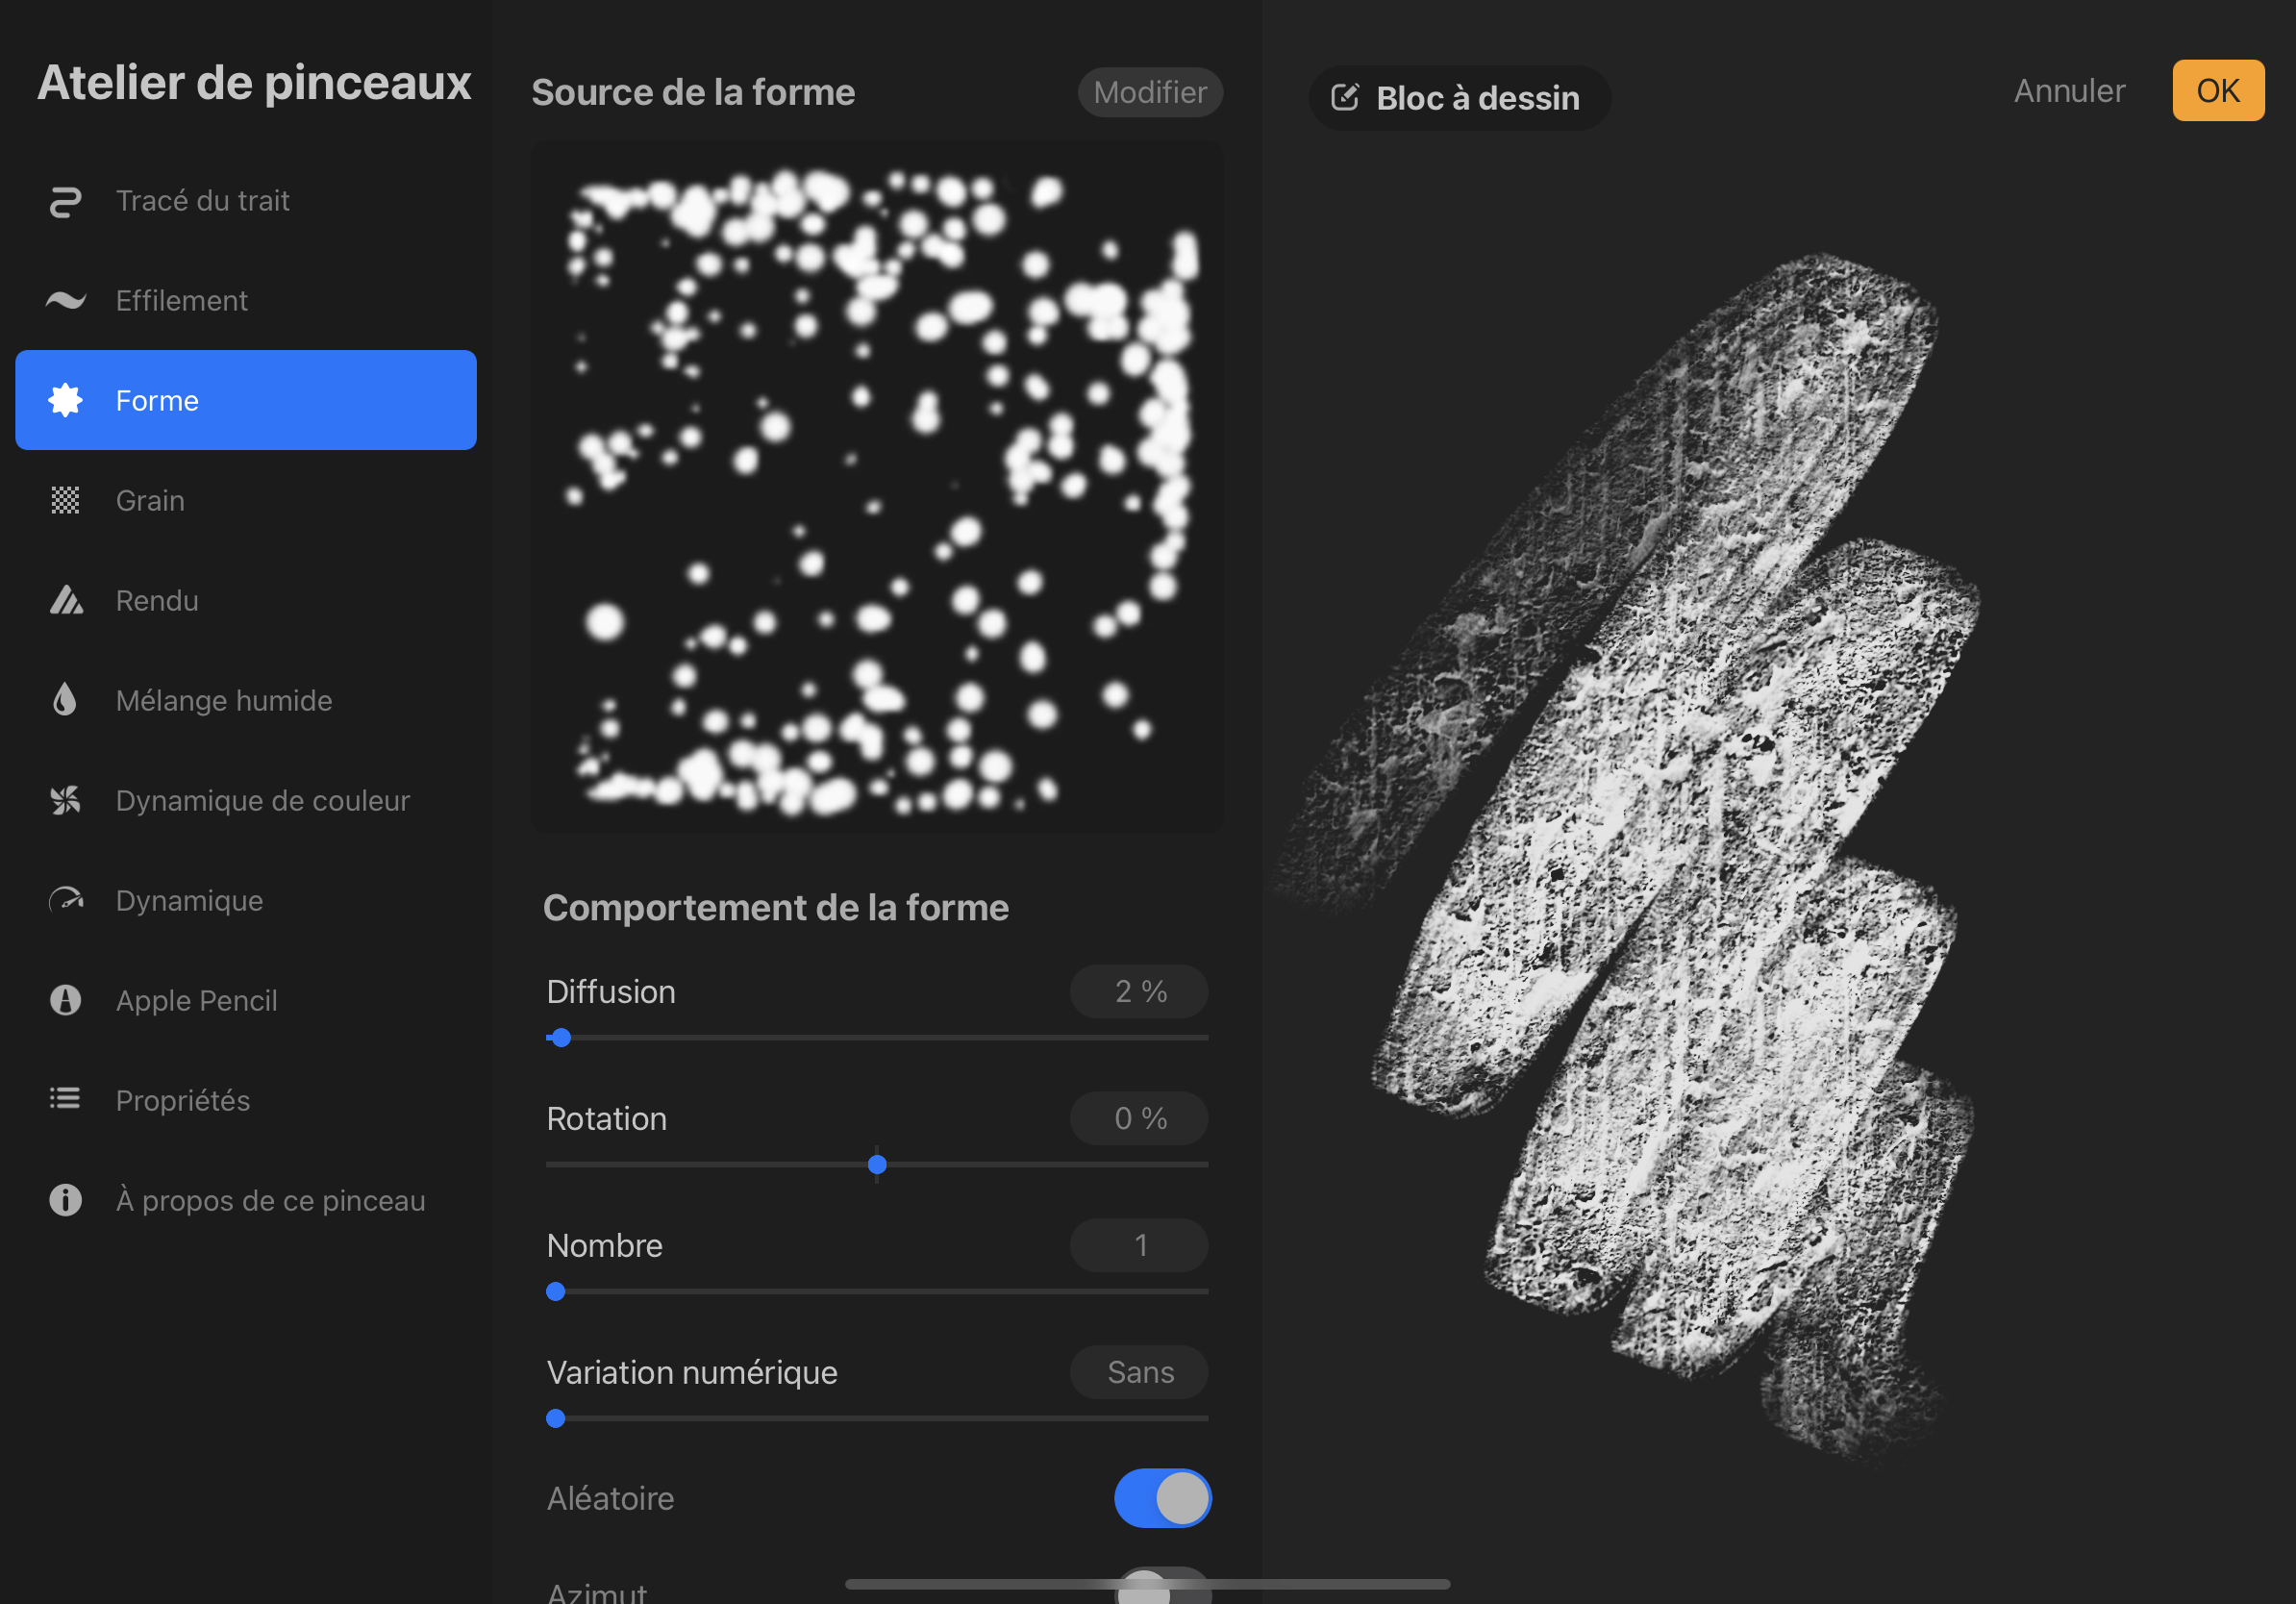
Edit brush settings
For modify a brushyou just have to click on it twice, and a new window appears: it’s called ” brush workshop“. Inside you can modify a lot of parameters at your whim. I talk about it in more detail in my article. How to customize a brush in Procreate.
For now, I just want to draw your attention to two tabs:
- The Shape tab, on the left of your screen in the Brush Workshop – this is where we’ll go create our brush : because each brush starts from a shape, which will allow us to make stamps or lines.
- The Grain tab: This is where we can set the texture of the brush.

How to create a brush in Procreate
Procreate has a library of shapes and grains that allows you to create brushes from existing content. But today I am going to explain the whole process of creating the brush.
Create a brush shape
Since every brush starts with a shape, let’s create one! On your canvas, draw a brush shape: it can represent something special, if you want to make a pattern, or it can look like the tip of a brush, if you want to make a particular line.
For my part, I’m going to start with a star shape. Once I’m happy with my stamp, I’ll export it as a jpeg.

Import this shape into brushes
So from the brush panel :
- Go to the directory you created
- Click the + at the top right of the tab. The Brush Workshop opens.
From now on, you have two options: you can choose to create a brush by importing your shape in the “shape” tab, or by importing it to the Grain tab. This second option is more suitable for creating geometric patterns. Let’s look at this in more detail.
1. Create a brush from a shape.
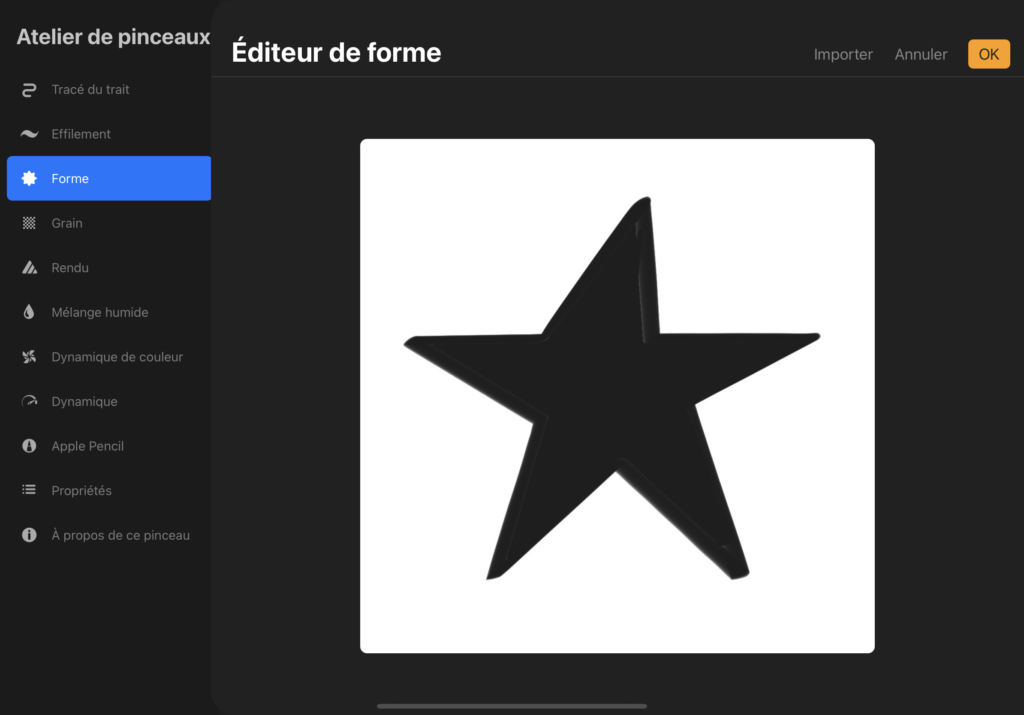
- Go to the Form tab that I introduced you to earlier.
- Click Edit at the top right of the shape.
- Click Import. As I told you before, Procreate offers you a source library of shapes. I invite you to browse and discover them. But for now, we’ll choose the “Import Photo” option.
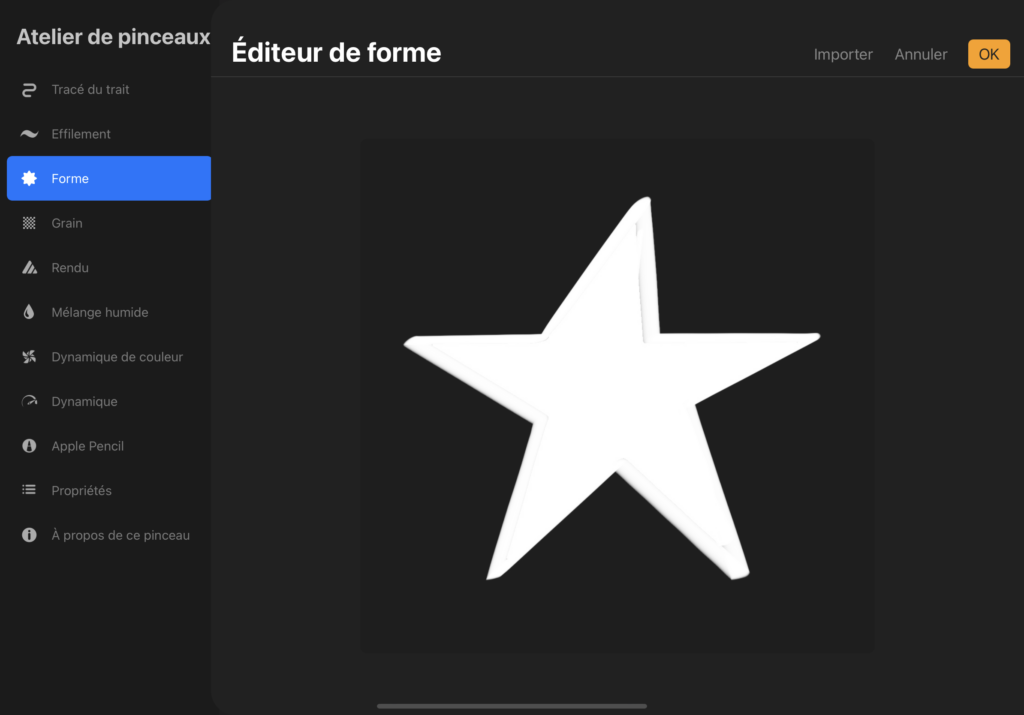
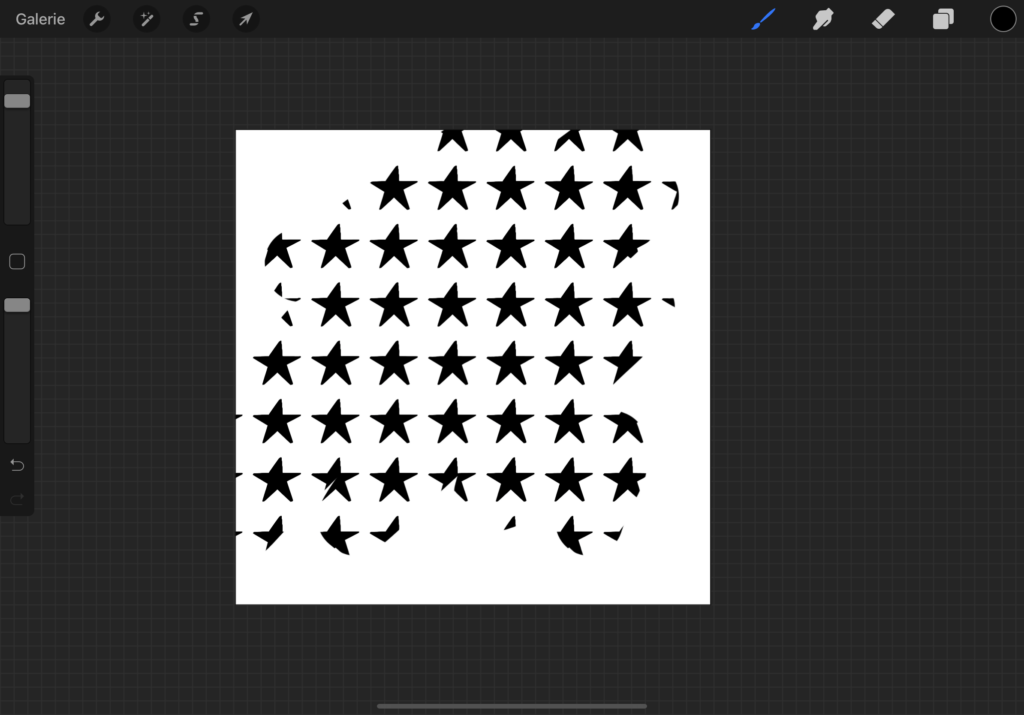
- Select the image you just created: it is displayed in black on white. But Procreate will hold the white surface to create the shape of your brush. To change it, click on it with two fingers. My star turns white.
- Then I invite you to discover the different tabs to customize your brush: there are an incredible number of parameters on the taper of your brush, its humidity, its color dynamics. I explain all this in my article How to customize a brush in Procreate, but I invite you to do your own tests. For my part, I played with the spread of my shape to give it a more interesting dynamic.
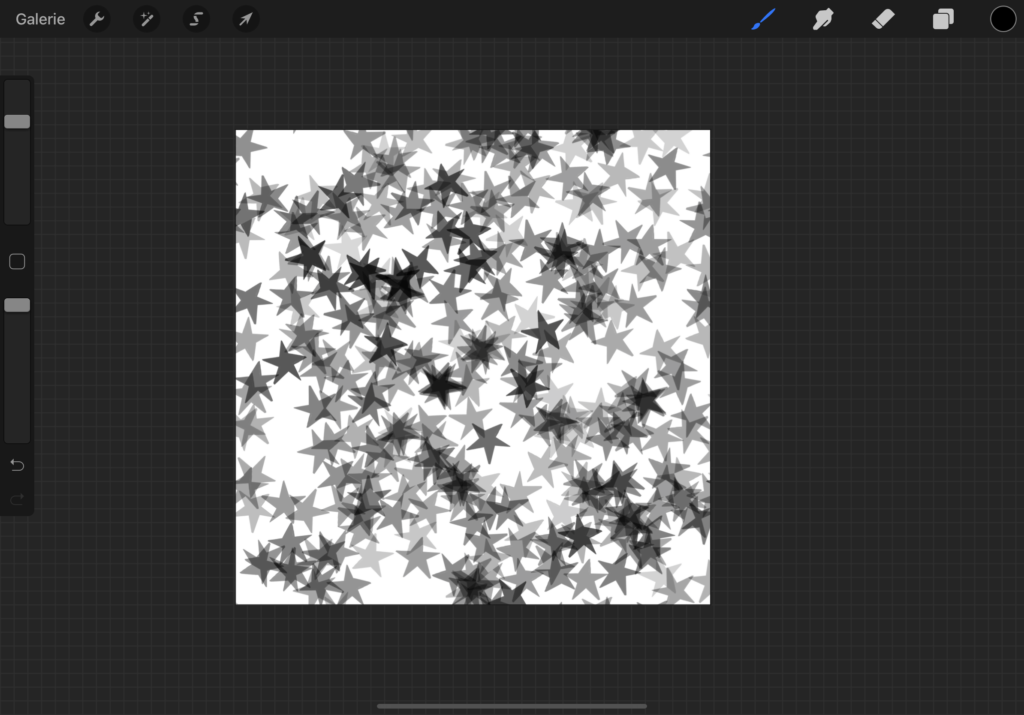
- Go back to your canvas: draw with your new brush. Make the necessary adjustments until you are satisfied with the result! Here are two tests I did: In the first one I just tapped the “Broadcast” option, in the shape tab. For the second one, I went to play around with the “Variation” option in the Line Drawing tab. This allows me to get completely different results!

2. Create a brush from the Grain.
- From the Brush Workshop, go to the Grain tab.
- Click Edit in the top right.
- Click import from photo
- import your stamp
- As before, click with two fingers to make your stamp negative (Procreate takes the white surface into account).
- I recommend that you check the scale, just below your imported shape, before clicking OK
- Test your stamp and make corrections accordingly.
well done now you know create your own brush in Procreate ! Don’t forget to save your work. And to learn more about Procreate: check out my other articles on the subject!