Canva: 12 tips to know to create your visuals easily
If you need to create visuals for a professional or personal project, Canva is an online graphic design tool that can be used for free. The online editor is easy to use, but you should know some tips to create your visuals more easily and save time!
Contents
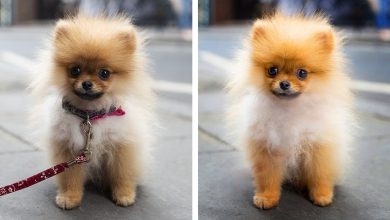
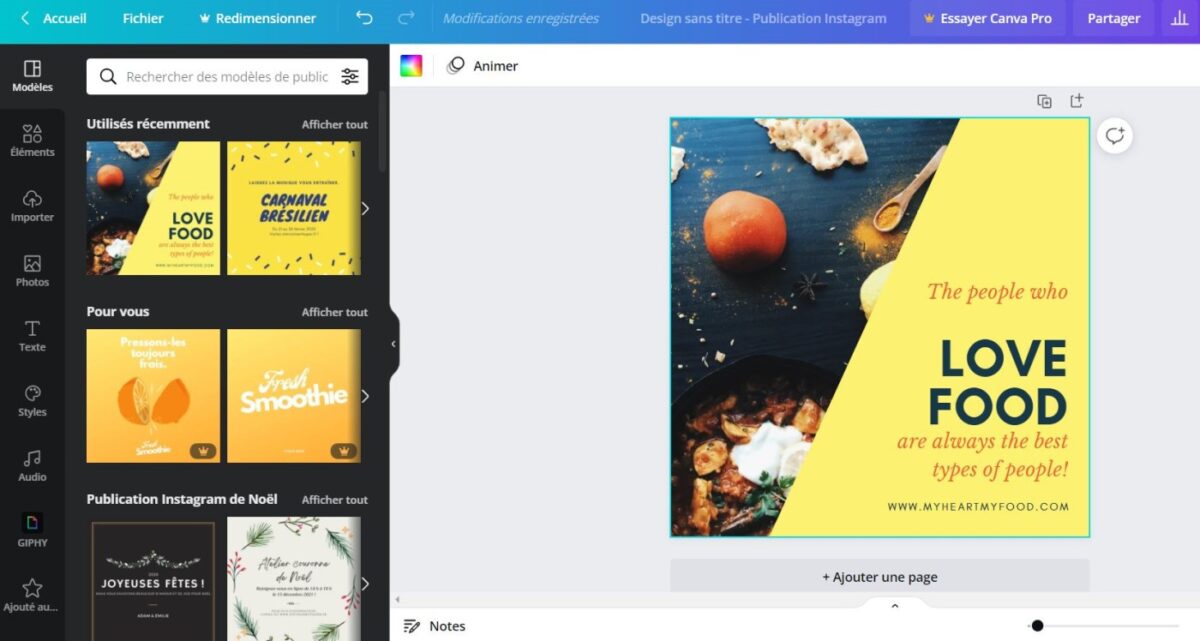
1. Use filters to find models and photos
For templates, you can sort by color and language. For photos, you can sort by color, orientation, and transparent background. To use the filters, just go to the section Models Where Picturesthen click on the icon to the right of the search bar.
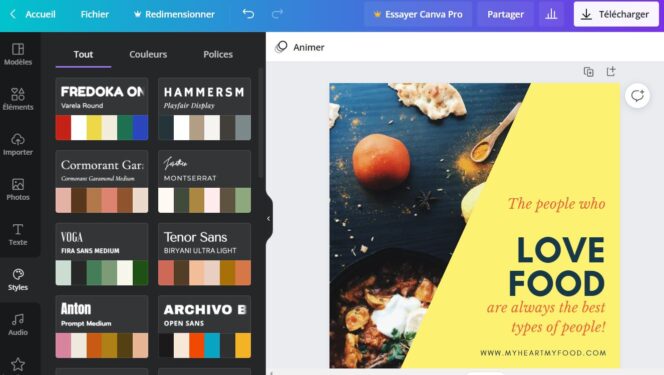
2. Modify the style of the whole document: colors and fonts
You have chosen a model but you don’t like the colors and fonts? You can change the whole style of your document with just a few clicks. Just click on the section stylesyou can change the color and type of fonts at the same time or choose to change only the color or only the fonts.
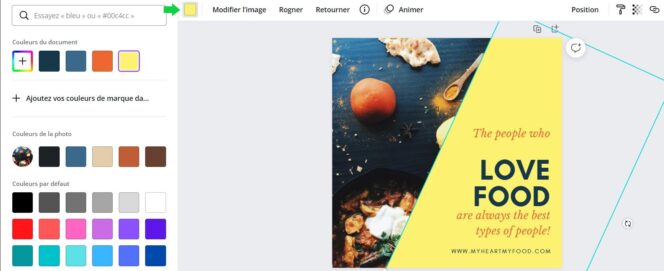
3. Apply colors from document or photo
You can find all the colors present in a visual by clicking on the color square icon (see image below). You will thus find the colors of the document (background, text, etc.) as well as those present in the photos. Very practical if, for example, you want to apply the color of a photo to one of your texts. Simply select the element whose color you want to change.
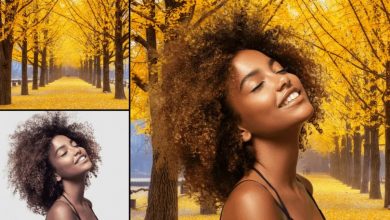
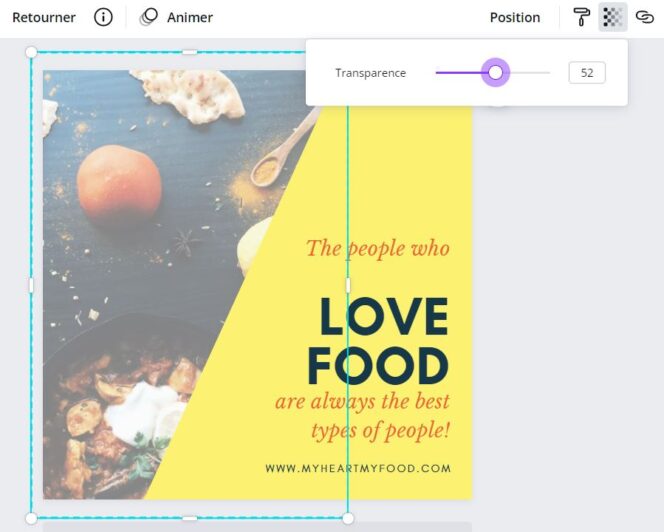
4. Add transparency to photo or color background
Want to make an element more transparent? It’s easy. First, select the desired element, then at the top right of the editor, click on the checkerboard icon. With the bar available, you can add more or less transparency to your photo or color background.
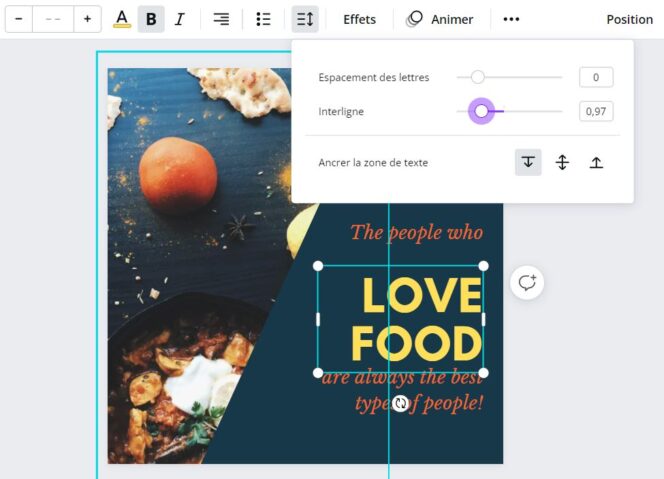
5. Space Your Text If It’s On Multiple Lines
You have the possibility to manage the space between two lines of text and also the space between the letters. Simply select the desired text, then click on the icon dedicated to spacing (see below).
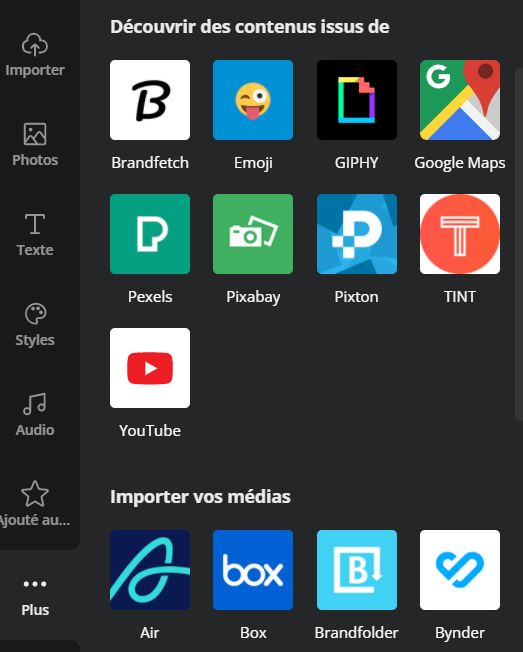
6. Add content from external sources: logos of well-known companies, emojis, illustrations, Google Maps…
yes you have a section Pictures in the editor but you have other additional resources available which can be very interesting for the creation of your visuals. Just click on the option More at the bottom left of the editor. Canva offers you to find content through different platforms, while remaining on the publisher. Thus, you can add images, GIFs, company logos, emojis, YouTube videos, illustrations, plans from Google Maps… The choice is yours!
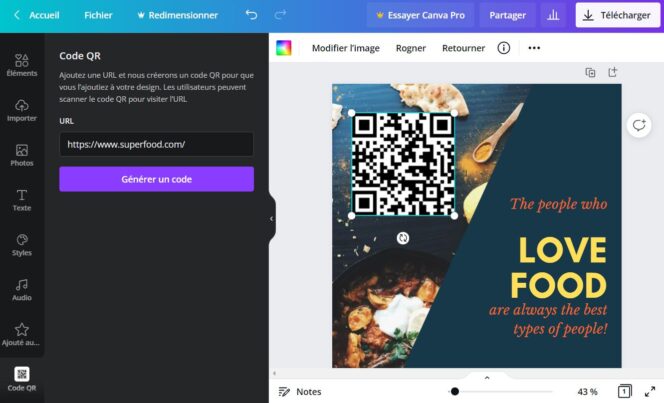
7. Add a QR code to your visual
Need to add a QR code to your creation? Nothing’s easier. Again, just click on the option More at the bottom left of the editor. You click on the QR Code icon, then you must enter the URL (the web page to which people who scan the QR Code will be redirected), then click on Generate code.
8. Change the position of text and images: foreground, background…
If you have overlapping elements, feel free to use the option Position, at the top right of the editor. You can easily manage the positions of your elements: move their position forward or backward, put them in the foreground or in the background…

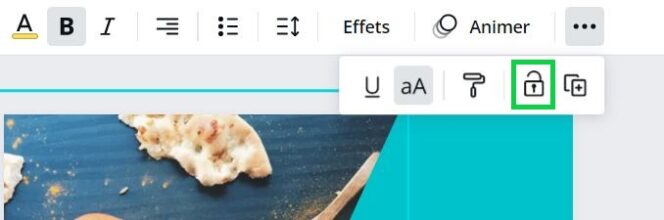
9. Lock an element of your visual to prevent it from moving
When you make changes to your creation, it very often happens that by moving one element, you move another, and it is true that it is annoying! A text is well placed? You can lock it so that it doesn’t move at all:
- lock photos or backgrounds: select your text then click on the padlock at the top right of the toolbar.
- lock text: select your text, click on the 3 small dots in the toolbar, then on the padlock (see image below).
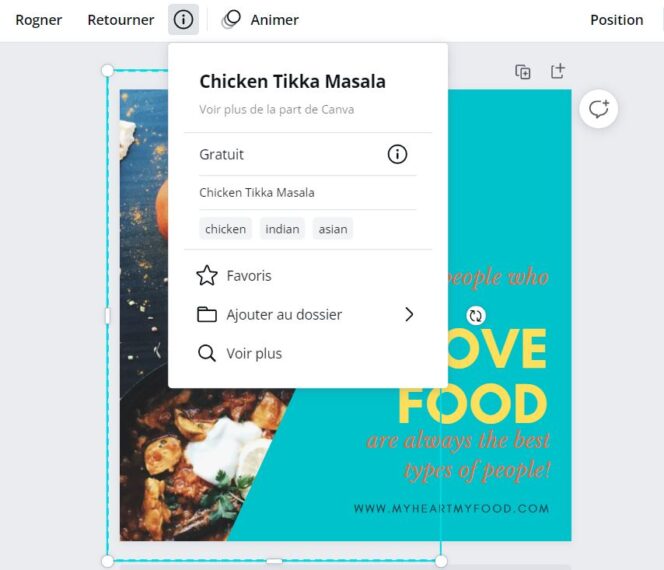
10. Add items to your favorites to find them easily
To easily reuse certain elements (photos, icons, illustrations, emojis, etc.), you can add them to a folder Favorites in Canva. Just click on the information icon (see image below) and then click on Favorites. Canva displays a pop-up telling you that your photo has been added to the folder, you can click Pin up to add the folder to the action bar on the far left of the editor and thus easily find all your favorite elements.
11. Show rulers, guides, margins, bleeds…
If necessary, on the display side, there are also options in the menu at the very top left, by clicking on File. In particular, you can display the rulers to help you place your elements with precision and you can also display the margins and bleeds for your needs on the print side.
12. Know Canva’s keyboard shortcuts to save time
Finally, a few shortcuts to know about Canva:
- the letter T: adding a text box
- the letter L: add a line
- the letter R: adding a square, rectangle
- the letter C: adding a circle
- Ctrl+K: add a link to an item
- Shift + ctrl + K: capitalize text
- Shift + click: select multiple items at the same time
- Ctrl+A: select all elements of your document
- Ctrl+G: group elements (you must have selected them beforehand)
- Shift + ctrl + G: ungroup elements
- Alt+ctrl+P: switch to presentation mode