What is composite photography and how can it be used?

The Art of Moving On, 2021. Composite photograph by Fares Micue.
Composite photography is the use or combination of two or more different images to create a new one. Although it sounds simple, the creation of a new image using the composite method is a process that can take hours — it’s something that requires constant practice in order to create believable compositions. But believe me, it’s worth it.
For me, the results of composite photography are dreamlike images, full of color, that play with the eye of the viewer. In my practice, Adobe Photoshop is an absolutely critical part of creating a composite, helping me shape everything from the mood to the coloring of my images. In fact, my favorite moment of any shooting day is when I can finally sit down to edit the image and see my vision coming to life on the screen, where I can finally share it with the world.
I am a fine art/conceptual photographer and I always add a touch of surrealism to my work, which means that many of my ideas end up as images that simply cannot be found in the real world. My images are full of color, optimism, characteristic elements, and imaginary places where I want to transport the viewers of my work. Here’s a bit of my workflow, both when shooting and when editing in Photoshop, and how I use composite photography to take people on a real journey to another world.
Contents
Shooting day for a composite photograph
When I sit down to plan my shooting day, I always try to write down as many elements as possible that I want to see in my final image. This includes things like props, colors, location, mood, and story. This helps avoid wasting any time on shooting day, but it also helps me estimate the editing time I am going to need. In addition to writing down these details, I like to create a doodle of my visions for the final image, which helps me remember to photograph any of the necessary parts for the composite.
Once I am ready to start shooting, whether outdoor or indoor, I shoot all the necessary elements on site in the same window of time (it can be tempting, with composite photographs, to break up your shoots). This helps me reduce the total editing time and create a “realistic” image that doesn’t look over-edited. Since all my images are self-portraits, shooting everything I need at one time, including things like props such as balloons, flowers, plants, or origami, helps me avoid problems like different lighting or unrealistic angles. These props often touch my body, and I need to always be mindful of shadows.
I make sure to take shots that are centered on a larger main frame. This way, I can expand my frame if I’d like in the editing phase, making the image bigger and including more details in my image without sacrificing quality. This is particularly useful if you’re doing outdoor composites. The last thing you want is a frame that is too small when you sit down to edit.
Plan outfits and equipment carefully
I always carefully plan my outfit in advance. I do this not only because I want to choose a style that helps me create the right mood, but also so I am mindful of the original clothing color if I want to change the final color in my edit. I take special care to wear colors that are suitable to change into my signatures, like blue and yellow, as well as avoiding any prints.
I always use a tripod and a remote for my shoots. Since I always have a fairly clear idea of the images I need, shooting is usually quite a straight-forward process that takes from 20 to 30 minutes max. Like most photographers, I shoot raw so that I can retain as much information as possible in the image. This gives me more freedom when it comes to manipulating the color and creating the image just as I imagine it.
How I composite in Photoshop: Layer Mask is your best friend
As mentioned, editing in Photoshop is my favorite part of the process, and I think this is partly due to my planning process — I always make sure I’ve shot all the necessary elements for my image before I sit down.
First, I choose my main frame around which I am going to build up my image. My favorite tool to create my composites is Layer Mask, which is a simple tool to help create amazing images. Another helpful tool for compositing your image is the Free Transformation Tool (Warp function) — this tool allows you to adjust the pieces you’re adding to the main frame, fixing any type of distortion and making them fit perfectly with your main frame.
Remove elements that distract, and play with color instead
After finishing my actual compositing, I go ahead with what I call “cleaning”. This is basically the action of eliminating any element that is distracting or doesn’t serve any purpose on my final image. For this step I usually use the Clone Stamp and also my beloved Layer Mask.
Finally, it’s time for coloring and toning. My work, for the most part, is made up of colors that are not natural in real life — for example, pink clouds, red sand, or blue plants (because that is the way I see it in my mind). I use a different tool to achieve this look. My favorite color adjustments tools are Curves and Selective Color, but I also go through Tone and Saturation, along with Brightness and Contrast.
Playing with color in this way helps to achieve beautiful and realistic dreamlike composite images.
Compositing to create location by adding and subtracting elements
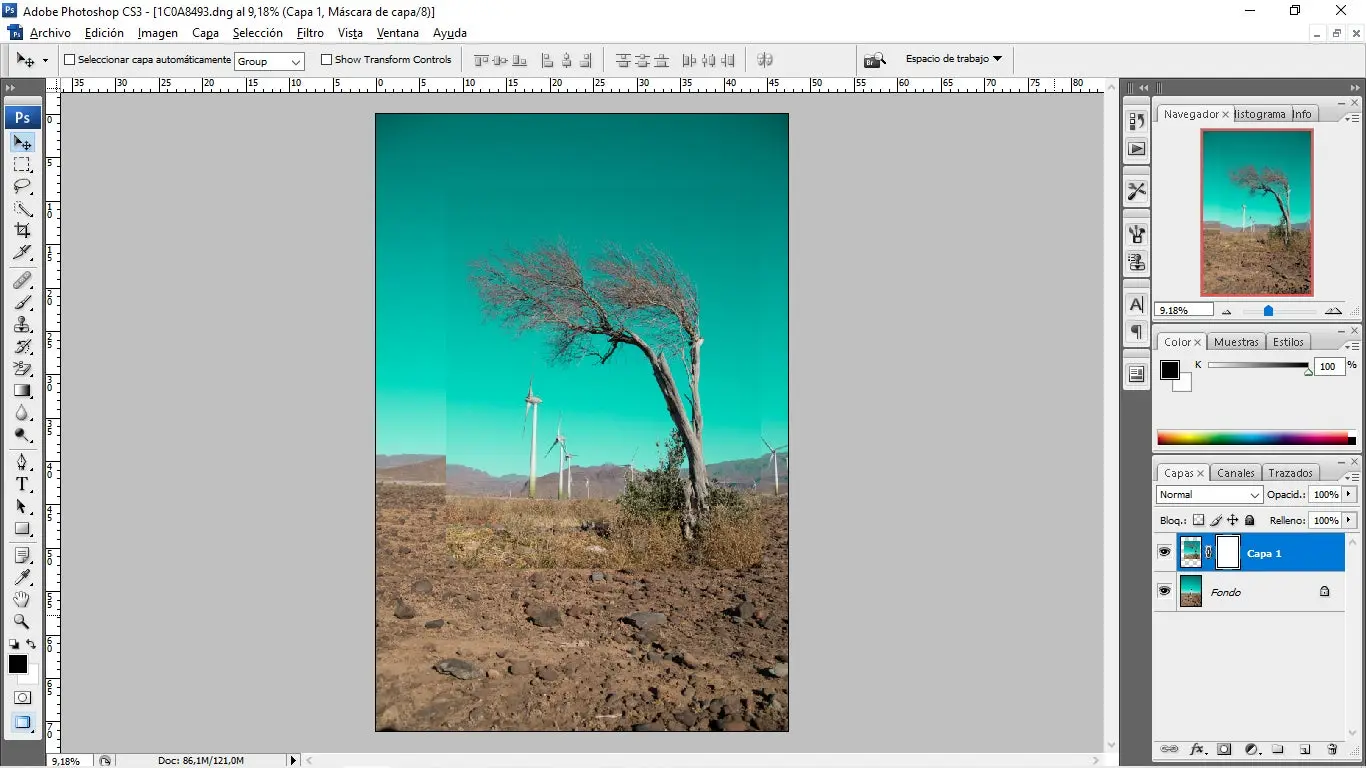
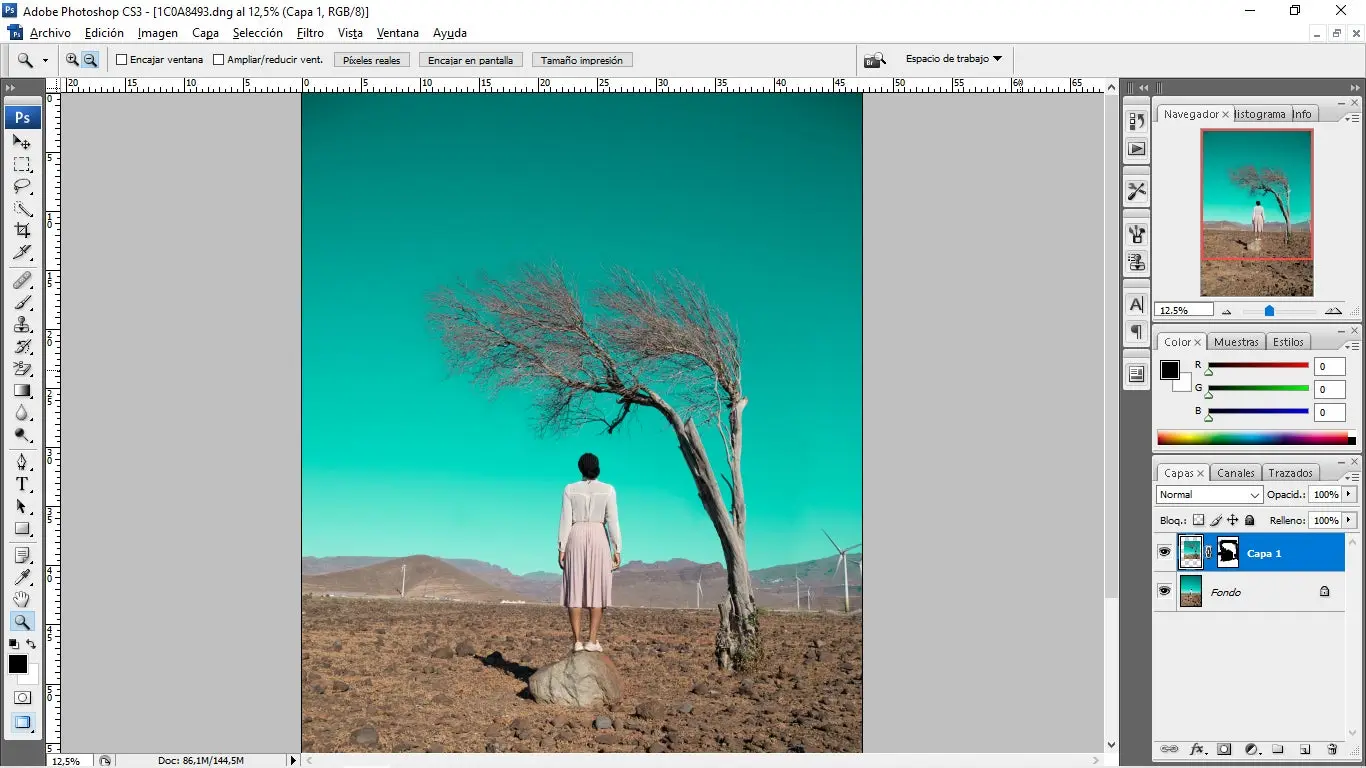
“Lonely us” was one of my first outdoor composites and it remains one of my favorites. Even though it doesn’t look like it would be a complicated edit, the final image looks completely different from the original photograph — the only elements that look similar to reality are myself and the tree. Beyond that, the end result is true fantasy, created in Photoshop on a completely new background with a lot of “cleaning,” expanding, and coloring.
I always get very excited every time I look at an image that requires a lot of editing, and this was no exception.
Since this was an outdoor shoot, I did some location scouting and chose a spot after discovering this lonely tree. It’s a place close to my house, and while a beautiful spot, the background is full of windmills, which I knew I was going to get rid of in the edit right away. In the far background there are very tall rocky mountains and I also knew I wanted a smoother and softer looking mountain, like a hill to create a more melancholic and feminine feel. I wanted the image to be “simple” but with a dramatic effect that could be achieved with the power of color.
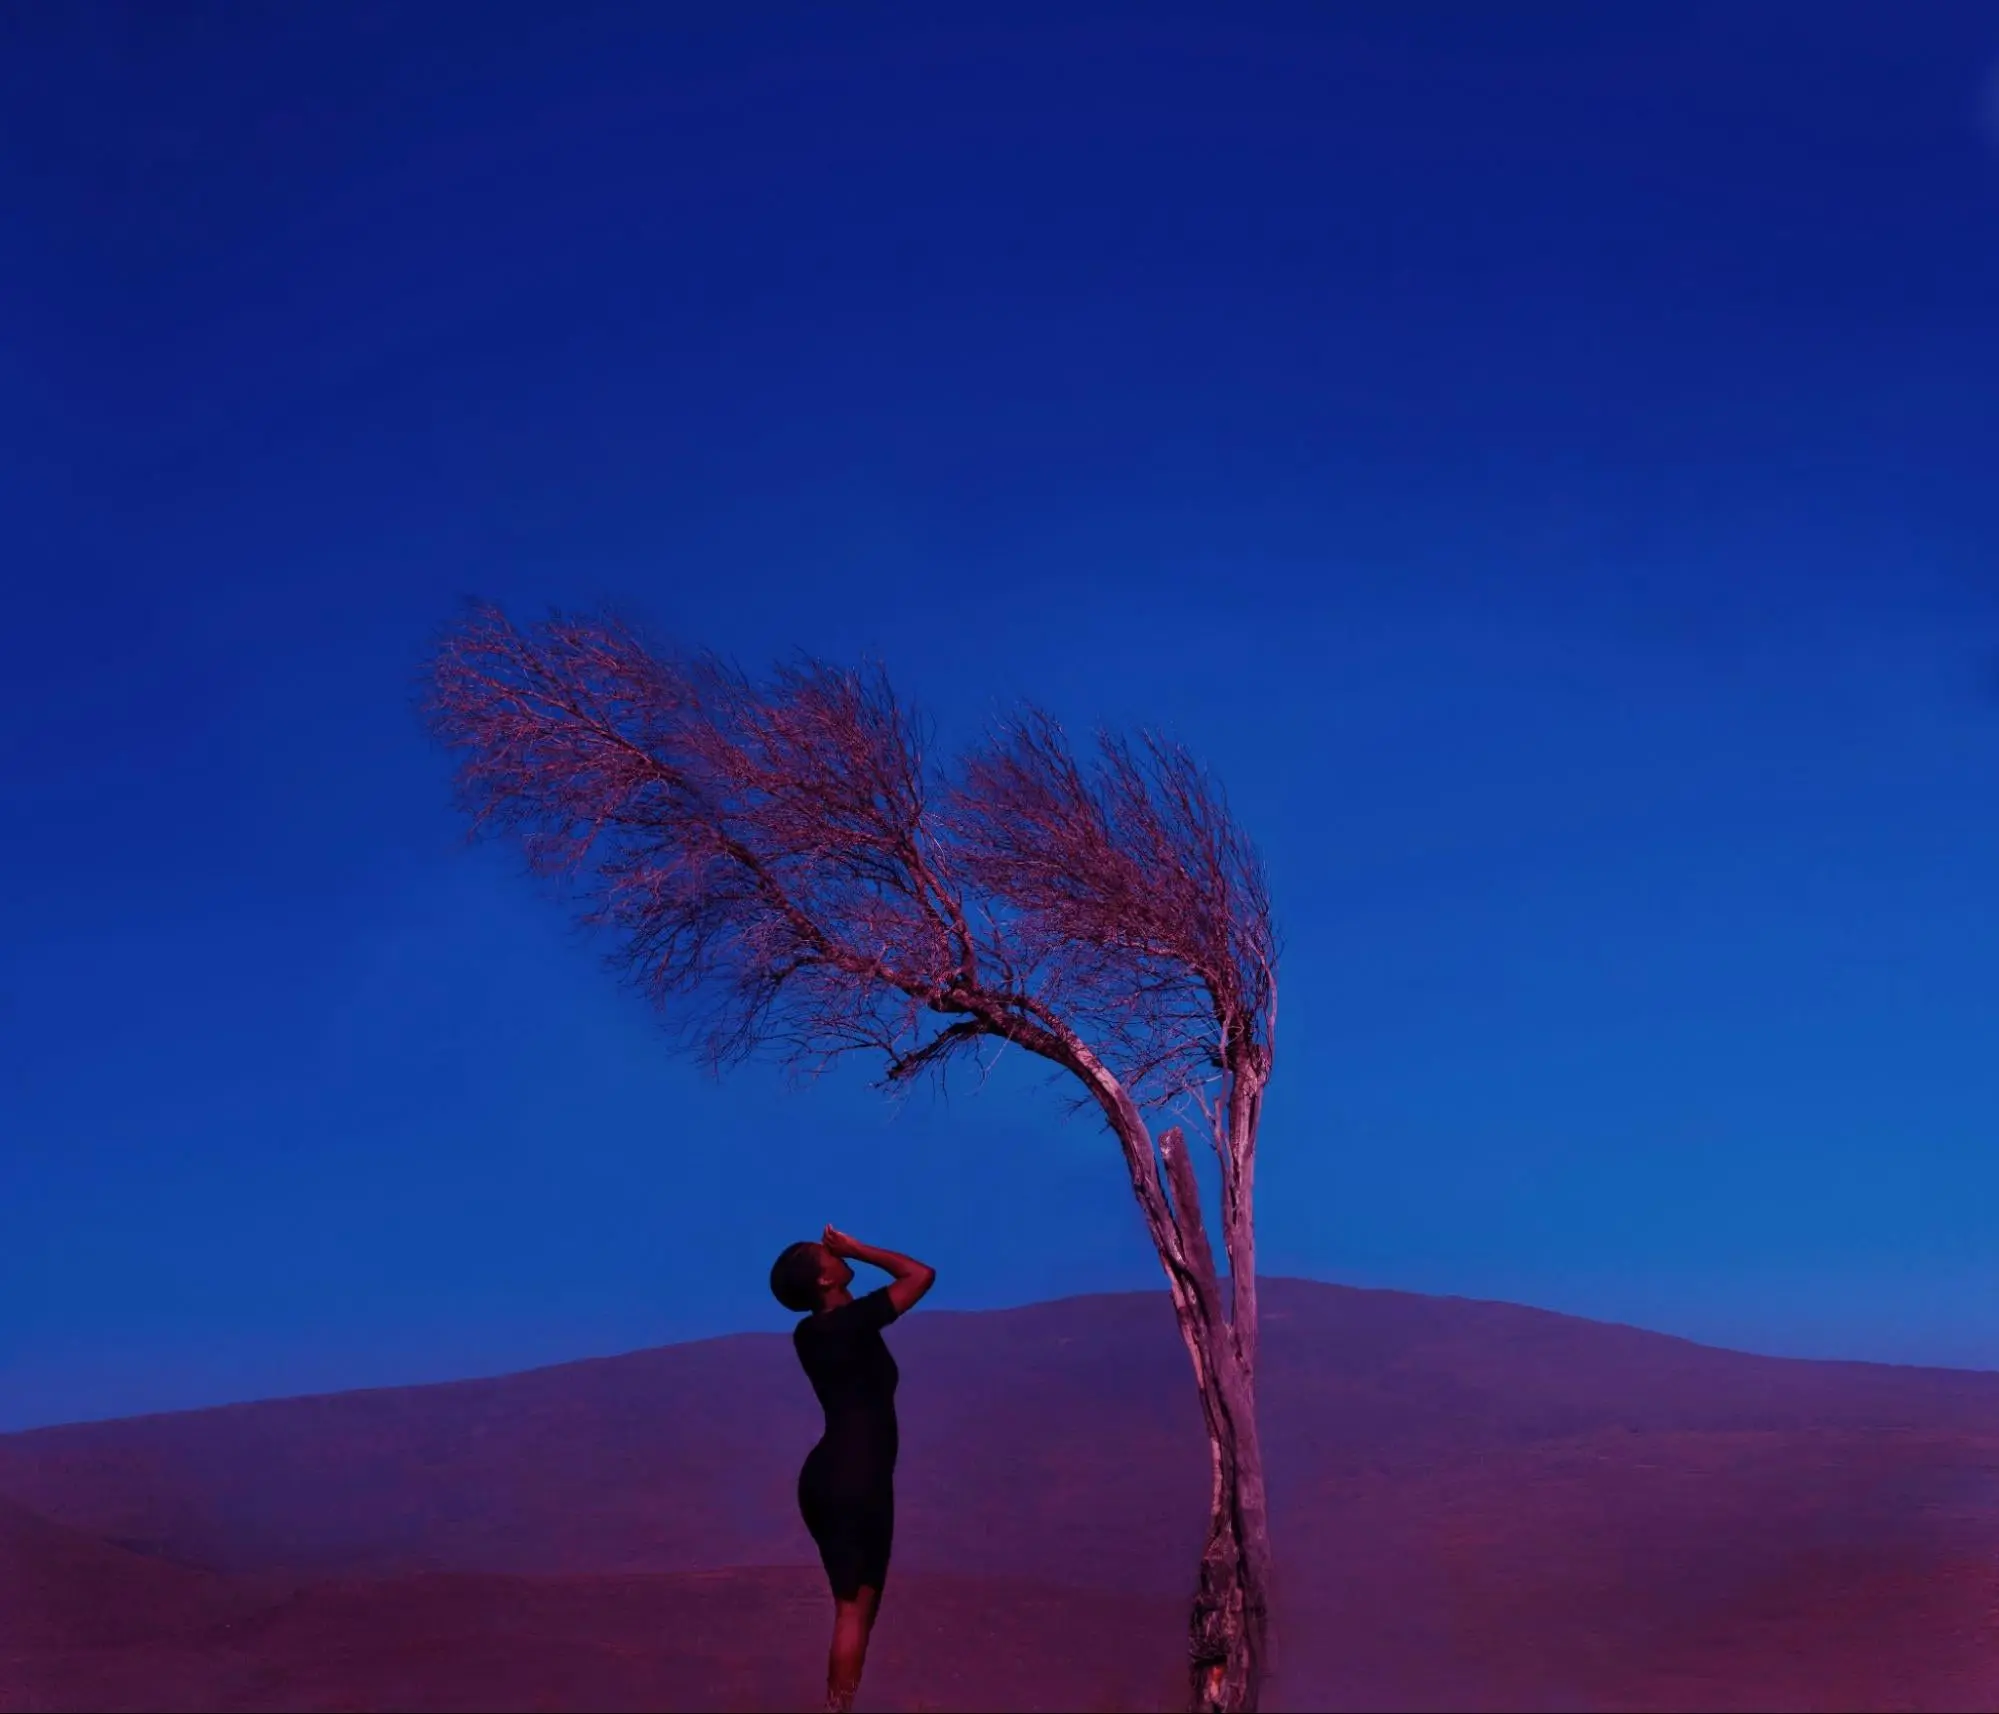
I did the shoot around 12pm, with the sun right on top of me, creating some harsh shadows on my face (that I really loved). The sky was infinite without a single cloud and having an intense baby blue color (I also knew I wanted to do a darker tone in the edit). I started with the composite and built-up the image with a Layer Mask, shaping the mountain and eliminating the windmills. Once I was satisfied with the image composition, I jumped into the coloring, using selective color, tone, saturation, and curves, and adding contrast and shine. In total, this image took me about 6 hours to complete.
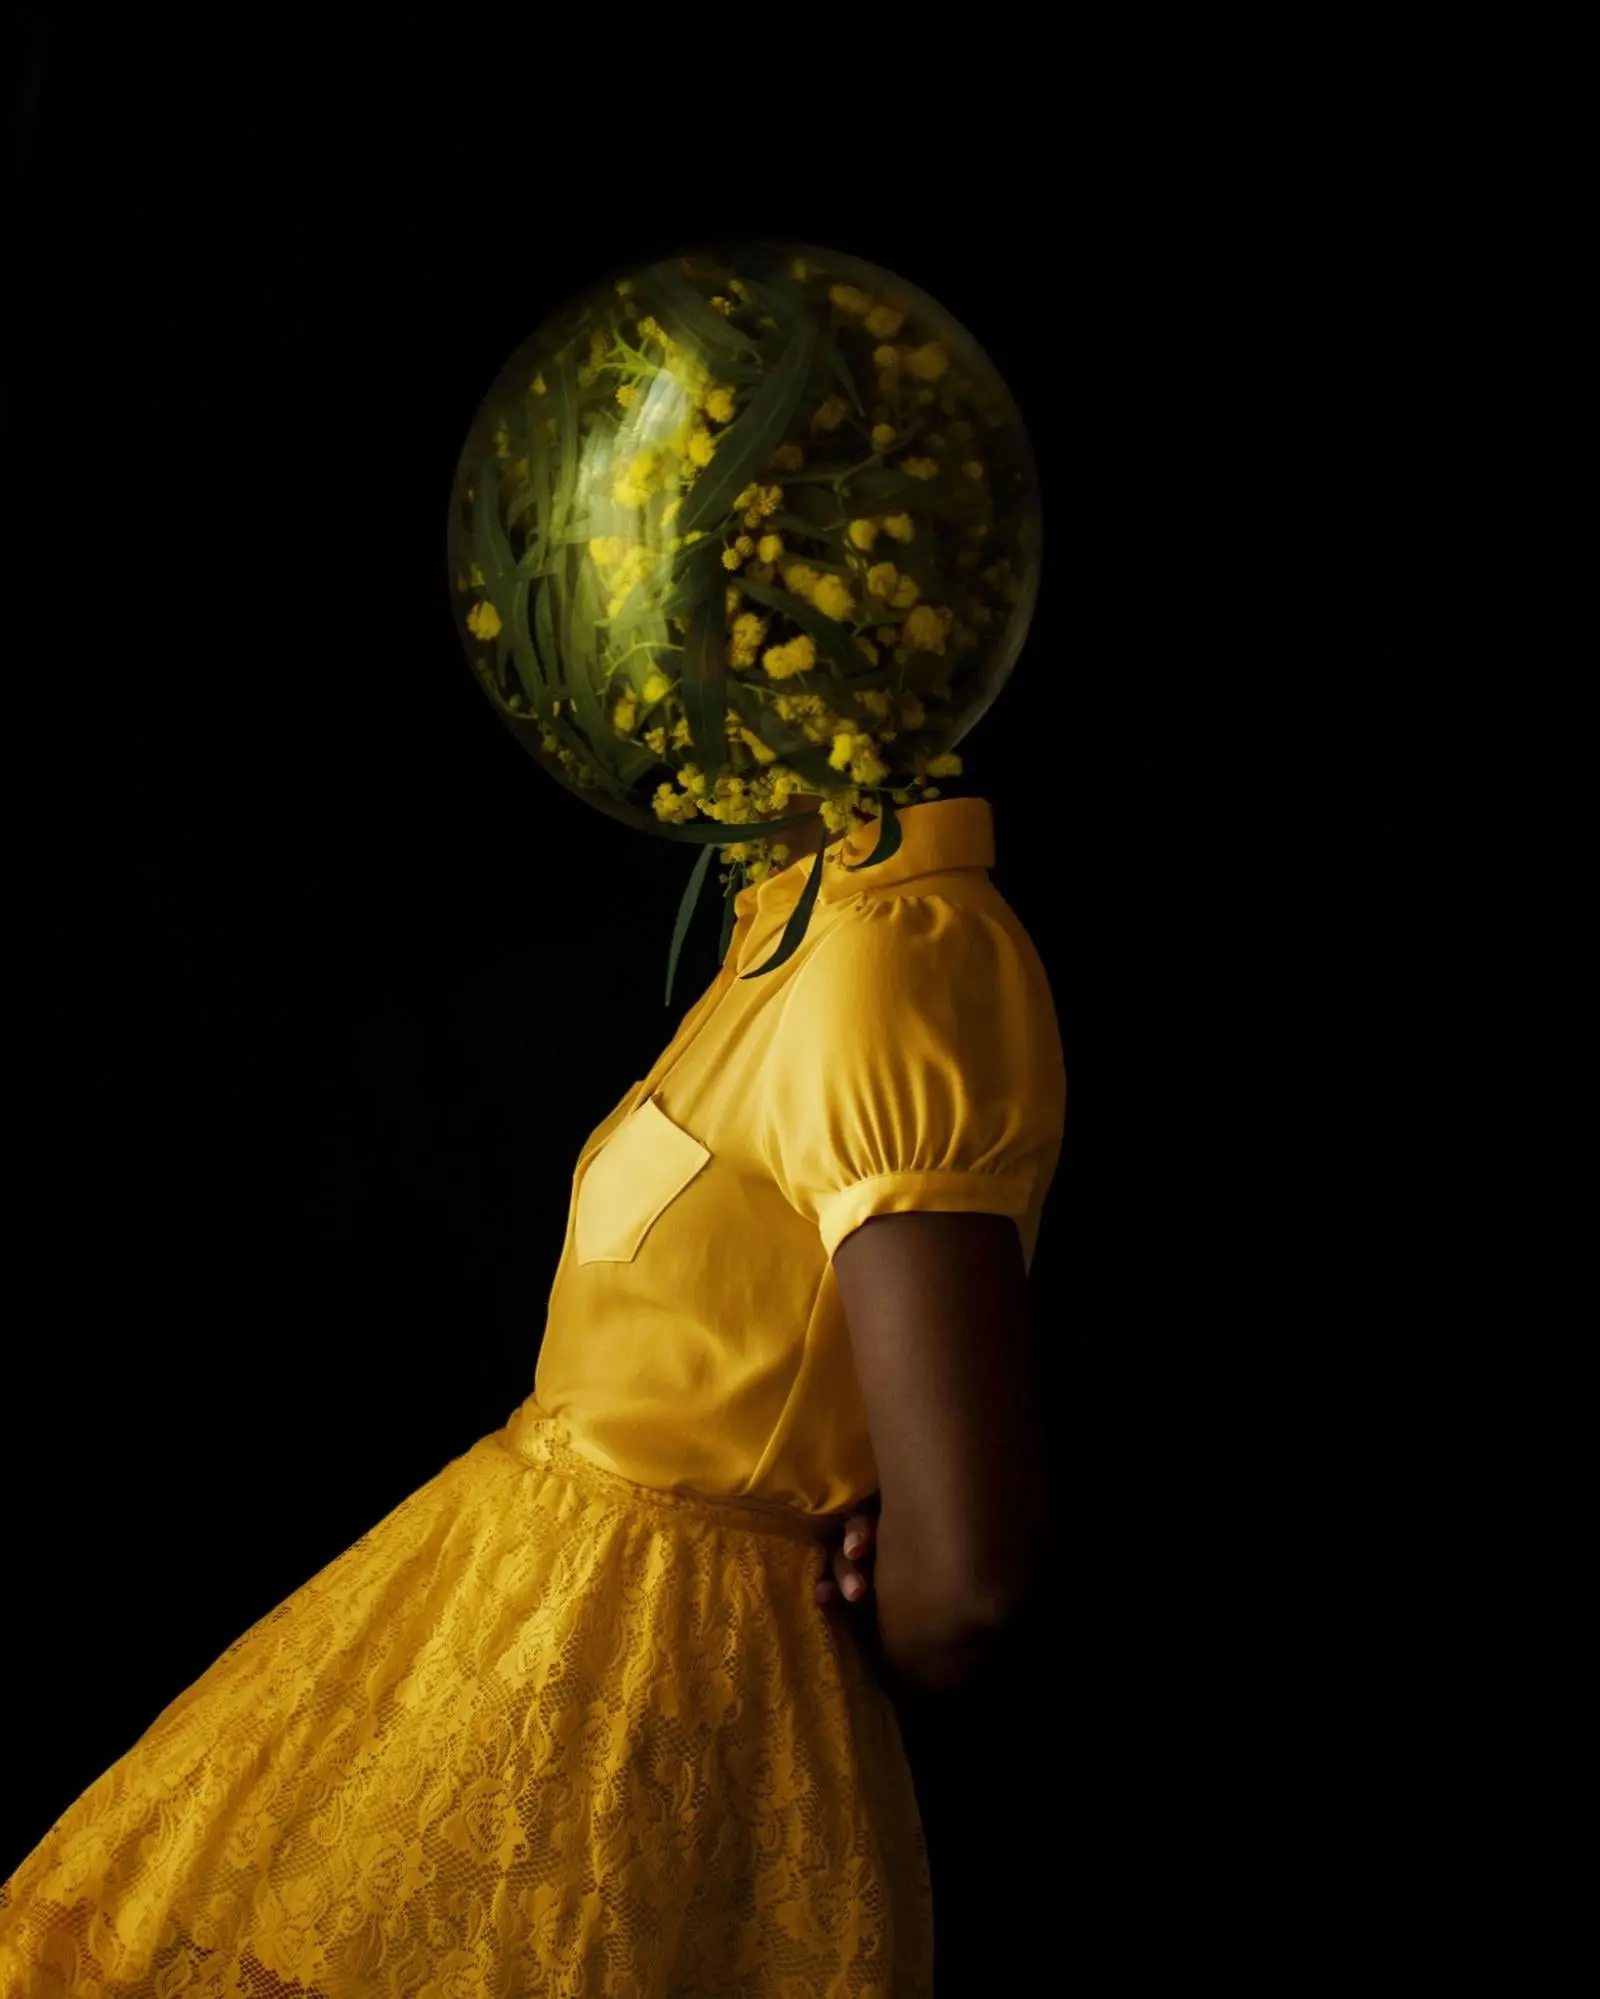
The making of “Golden Girl” and “Inside Your Heart”
With this indoor image, I had the main element and key component (a fishbowl that needed to be placed on my head), which of course didn’t fit! I knew I could achieve this effect by compositing, and planned for what I would need. I knew I needed a photo of myself in my desired position – my main frame.
After shooting myself, I made sure to photograph the plants around my neck, so that I could later realistically blend the fishbowl, Lastly, I photographed the fishbowl with the plants inside (I also photographed the fishbowl empty, just in case). Then it was time to create my image.
My go-to tool was Layer Mask – I made sure to adjust the fishbowl to the size of my head, and then worked the shadows and plants around my neck. My last step was to do coloring and retouches, like dodge and burn, contrasts, etc. This image took around 4 hours to make.
“Inside Your Heart” was one of the most complicated composites I’ve ever made. The photograph is composed of two main images: the flower that I photographed outdoors, and myself which I photographed indoors. When you deal with this type of composite you need to be very careful with the light and shadows since they will determine how well your image blends.
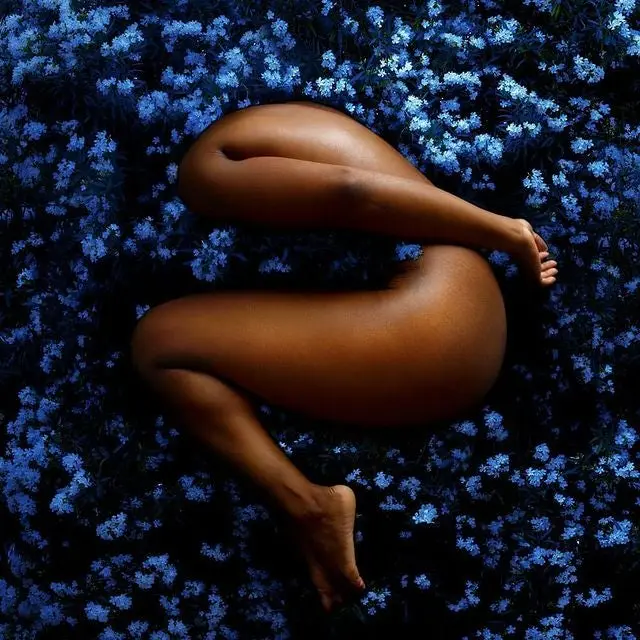
‘Inside You’, 2020, Fares Micue.
I started with the Layer Mask tool to build up the image, then I used the Curves tool to bring in the shadows, highlights, and coloring. In Photoshop you have endless possibilities and tools to find and express your own style and turn your ideas into reality. My work is very conceptual and I use the power of color, body language, and of course, the strategic placement and choice of props to share a message or a feeling with the public.
Since early childhood, I have always loved art and the act of creating things that didn’t exist before. My original dream was to become an actress — as time went on this dream shifted but what didn’t change was my desire to create, share, and help people with my stories, reflections, and perception of life. When I got into photography and discovered Photoshop I knew this was the path I wanted to follow, as the tool gives me the chance to create exactly what I envision in my mind. My work is positive and encouraging because that is the message I want to share with the world — I want this message of positivity and empowerment to reach as many people as possible and thanks to composite I’m able to do that.
To learn more, check out this tutorial on how to create composites in Adobe Photoshop.
Source : Adobe