From the ACR team: Super Resolution
Article by Eric Chan, senior principal scientist at Adobe, explaining how the new machine learning powered Super Resolution feature in Lightroom works.
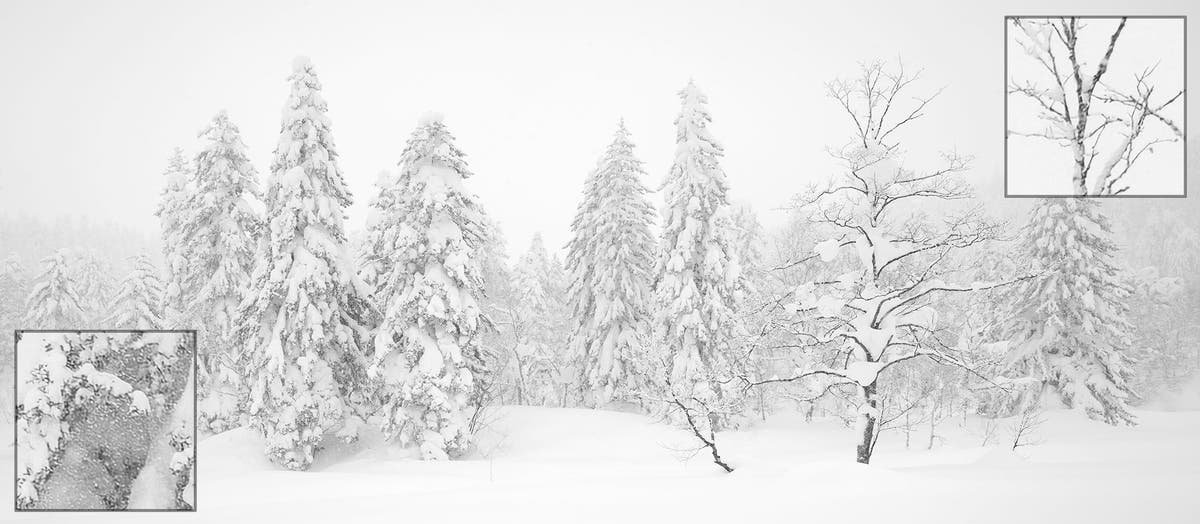
Panorama enhanced with Super Resolution. The inset images show zoomed-in crops of two areas of the photo, with crisply rendered branches and flying snow.
“From the ACR team” is a blog series that brings you insights directly from the team that builds the imaging features for Lightroom, Lightroom Classic, Lightroom mobile, Adobe Camera Raw, and the Camera Raw filter in Photoshop. I recently worked on a feature called Enhance Super Resolution and I’m delighted to share it is now live today. I collaborated closely on this project with Michaël Gharbi and Richard Zhang of Adobe Research. Michaël also previously developed a related feature, Enhance Details.
Super Resolution is now shipping in Camera Raw 13.2 and will be coming soon to Lightroom and Lightroom Classic. In this post I’ll explain what it is, how it works, and how to get the most from it.
My name is Eric Chan, and I’ve worked at Adobe for thirteen years. Previous projects that I’ve worked on include Highlights and Shadows, Clarity, Dehaze, Camera Profiles, Lens Corrections, and Upright. You might sense a pattern here — I like to mess around with pixels.
Super Resolution is also a pixels project, but of a different kind. Imagine turning a 10-megapixel photo into a 40-megapixel photo. Imagine upsizing an old photo taken with a low-res camera for a large print. Imagine having an advanced “digital zoom” feature to enlarge your subject. There’s more goodness to imagine, but we’re getting ahead of ourselves. To understand Super Resolution properly, we must first talk about Enhance Details.
The origin story
Two years ago, we released Enhance Details, a feature that uses machine learning to interpolate raw files with an uncanny degree of fidelity, resulting in crisp details with few artifacts. You can read more about that here. We reasoned at the time that similar machine learning methods might enable us to improve photo quality in new and exciting ways.
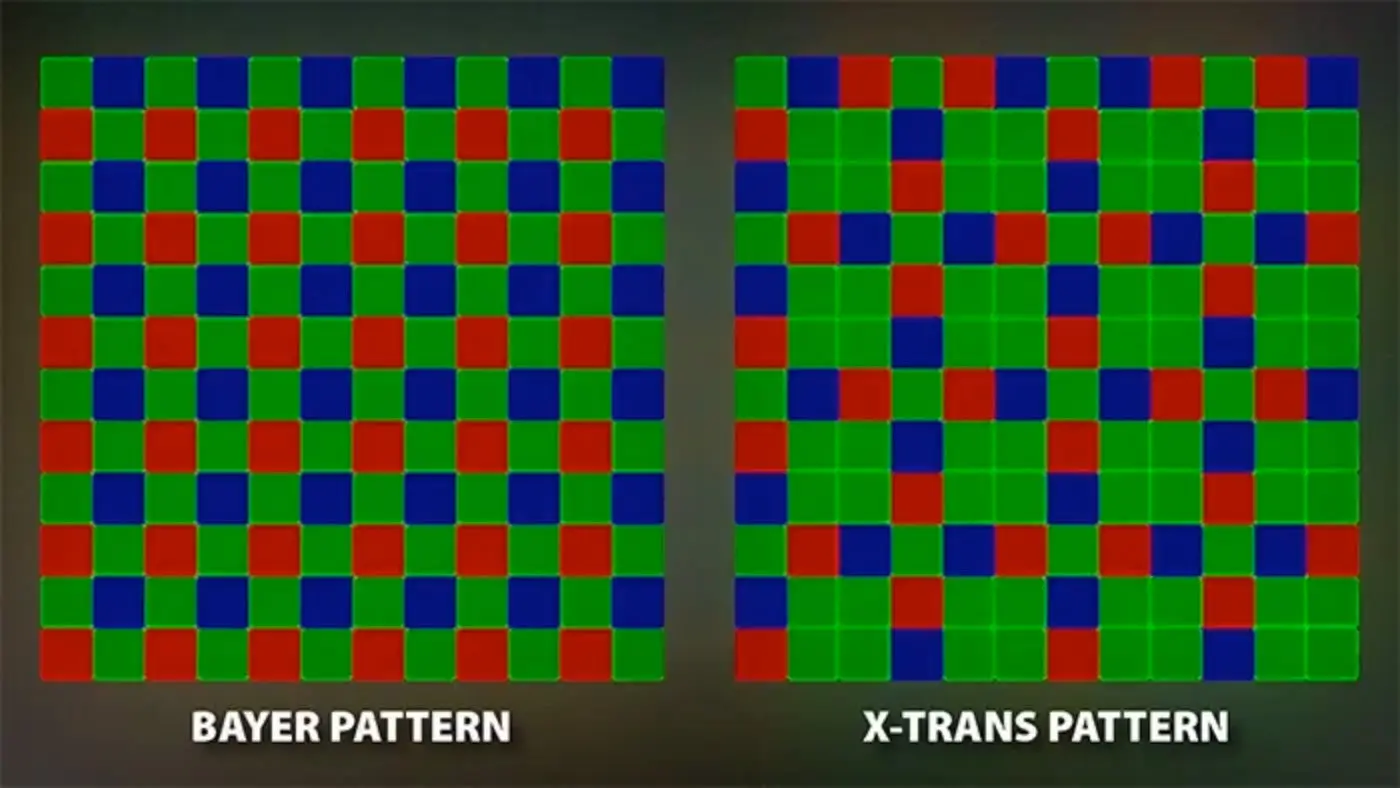
Camera sensors see the world through mosaic patterns like the ones shown above. Enhance Details uses machine learning to interpolate those patterns into RGB color images.
The sequel
Today I am thrilled to introduce our second Enhance feature: Super Resolution. The term “Super Resolution” refers to the process of improving the quality of a photo by boosting its apparent resolution. Enlarging a photo often produces blurry details, but Super Resolution has an ace up its sleeve — an advanced machine learning model trained on millions of photos. Backed by this vast training set, Super Resolution can intelligently enlarge photos while maintaining clean edges and preserving important details.

Example using bicubic resampling

Super Resolution
If all that machine learning language sounds complicated, well, that’s because it is. Don’t worry, though — the Super Resolution feature we built around this technology is very simple to use — press a button and watch your 10-megapixel photo transform into a 40-megapixel photo. It’s a bit like how Mario eats a mushroom and suddenly balloons into Super Mario, but without the nifty sound effects.
Do we really need more pixels?
I know what you’re thinking — “C’mon Eric, it’s 2021, are we really still talking about more megapixels?” Modern cameras have pixels to spare, don’t they? Once upon a time, we all thought 6 megapixels was plenty. Then 12 became the new 6, and now 24 is the new 12. There are even cameras with a whopping 40 to 100 megapixels. With all those pixels floating around, why do we need more?
The short answer is — Usually we don’t, but occasionally we do. And sometimes, we really really do.
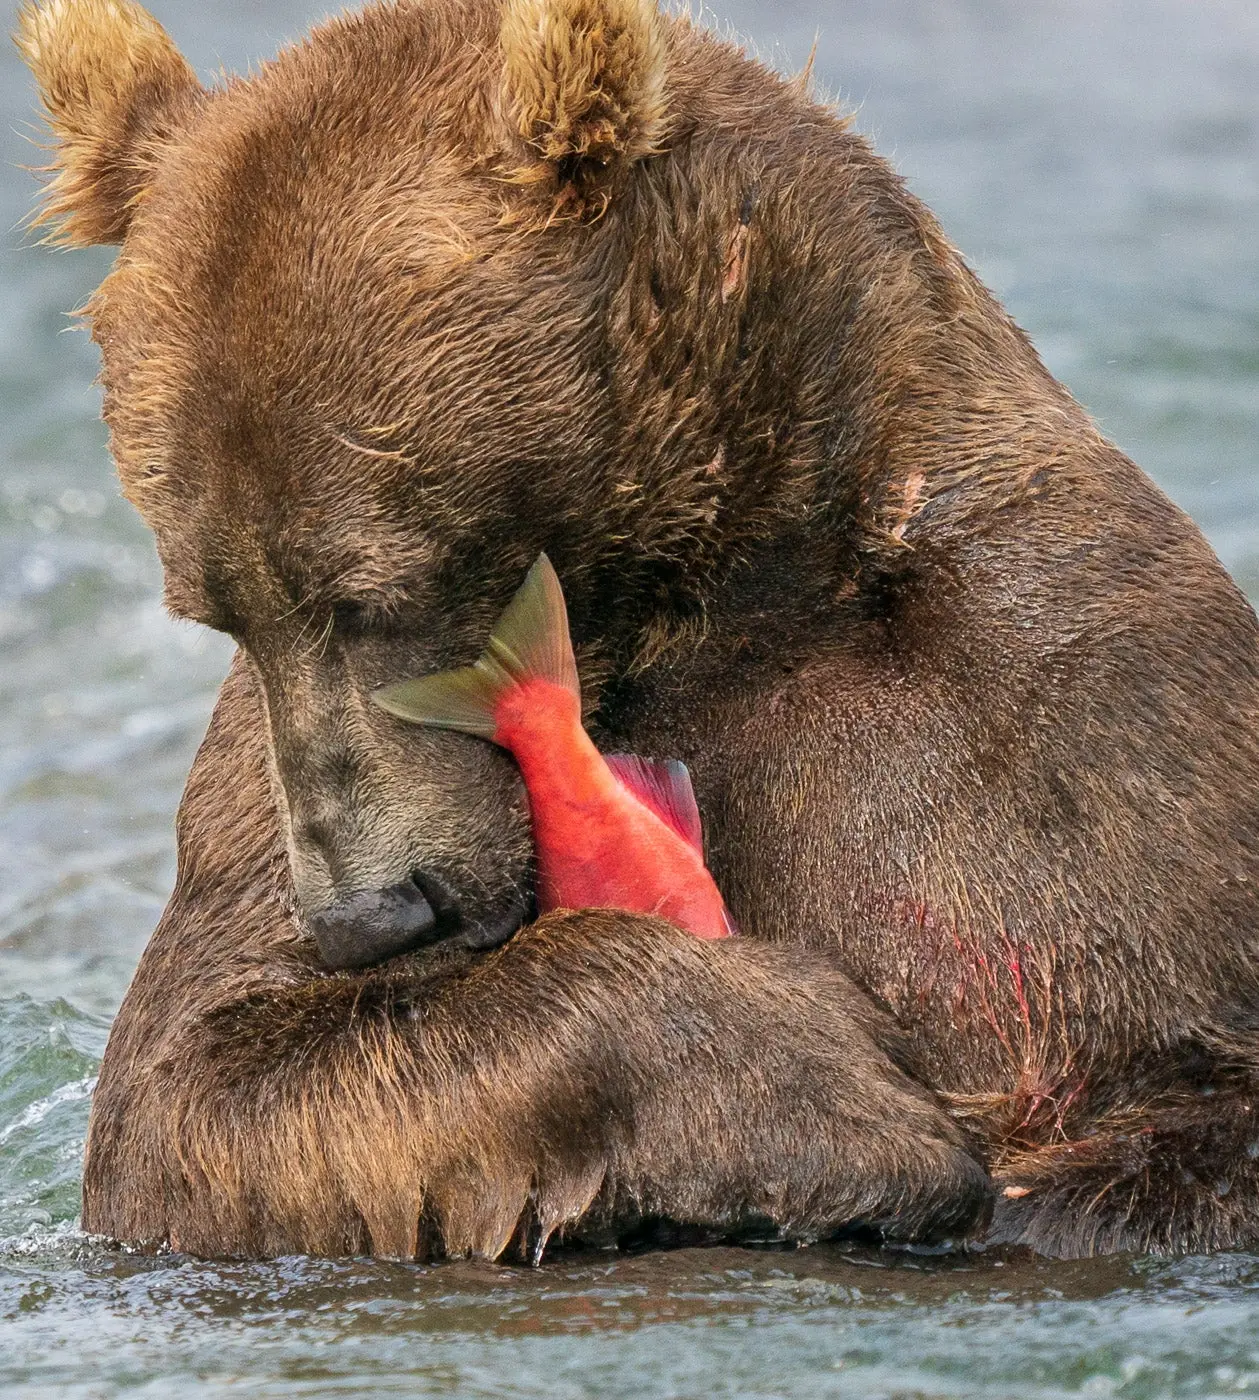
Here’s one of those cases where it’s helpful to have more resolution. After photographing the bear from a safe distance and cropping the image down, I was left with “only” 4 megapixels.
Here’s the longer answer.
First, not all cameras have those sky-high resolutions. Most phones are 12 megapixels. Many cameras are still in the 16-to-24-megapixel range. This is plenty for many scenarios, like posting online or sending to a friend. If you want to make a large print to display on your wall, though, extra resolution helps to keep edges clean and details intact. We’ll look at some examples later.
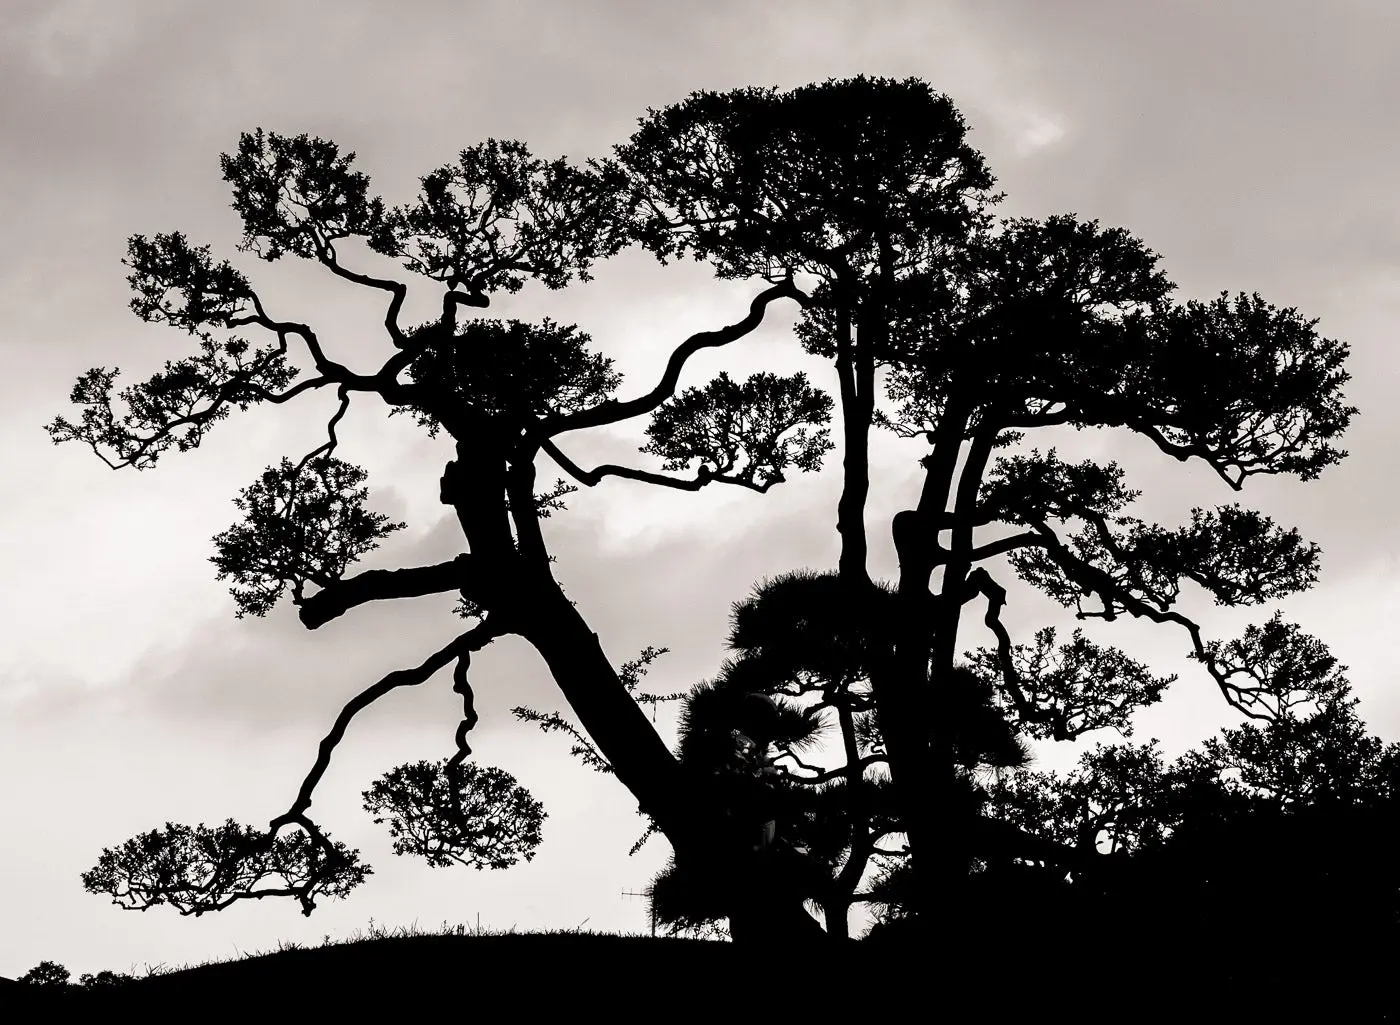
Even if you have a shiny new camera with a zillion pixels, what about those older pictures already in your catalog taken with a lower resolution model? Some of my favorite pictures were taken fifteen years ago using a camera with “only” 8 megapixels. Here’s one:
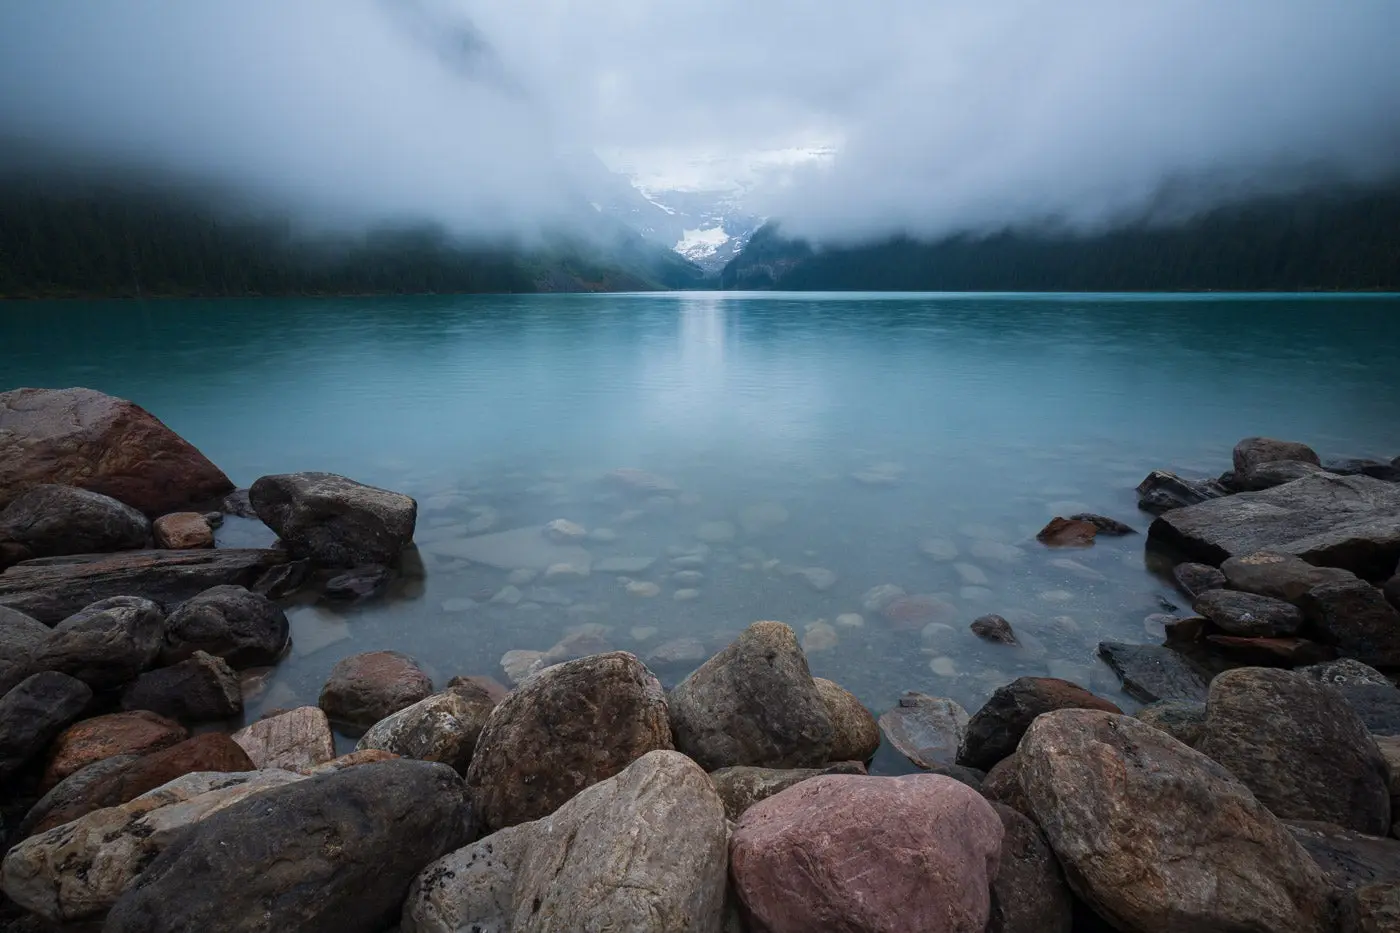
Previously I tried making a large print of this image, but I was disappointed in the results. The foreground rocks came out overly smooth and the background trees below the incoming fog were mushy and hard to see. With the help of Super Resolution, I can now make a large print with textured, natural-looking rocks and distinct background trees. In short, Super Resolution can breathe new life into old photos.
More resolution also comes in handy when working with tightly cropped photos. Ever been in a situation where you’re photographing from farther away than you’d like, so you end up with your subject occupying only a small part of the image? Happens to me all the time. Here’s an example:
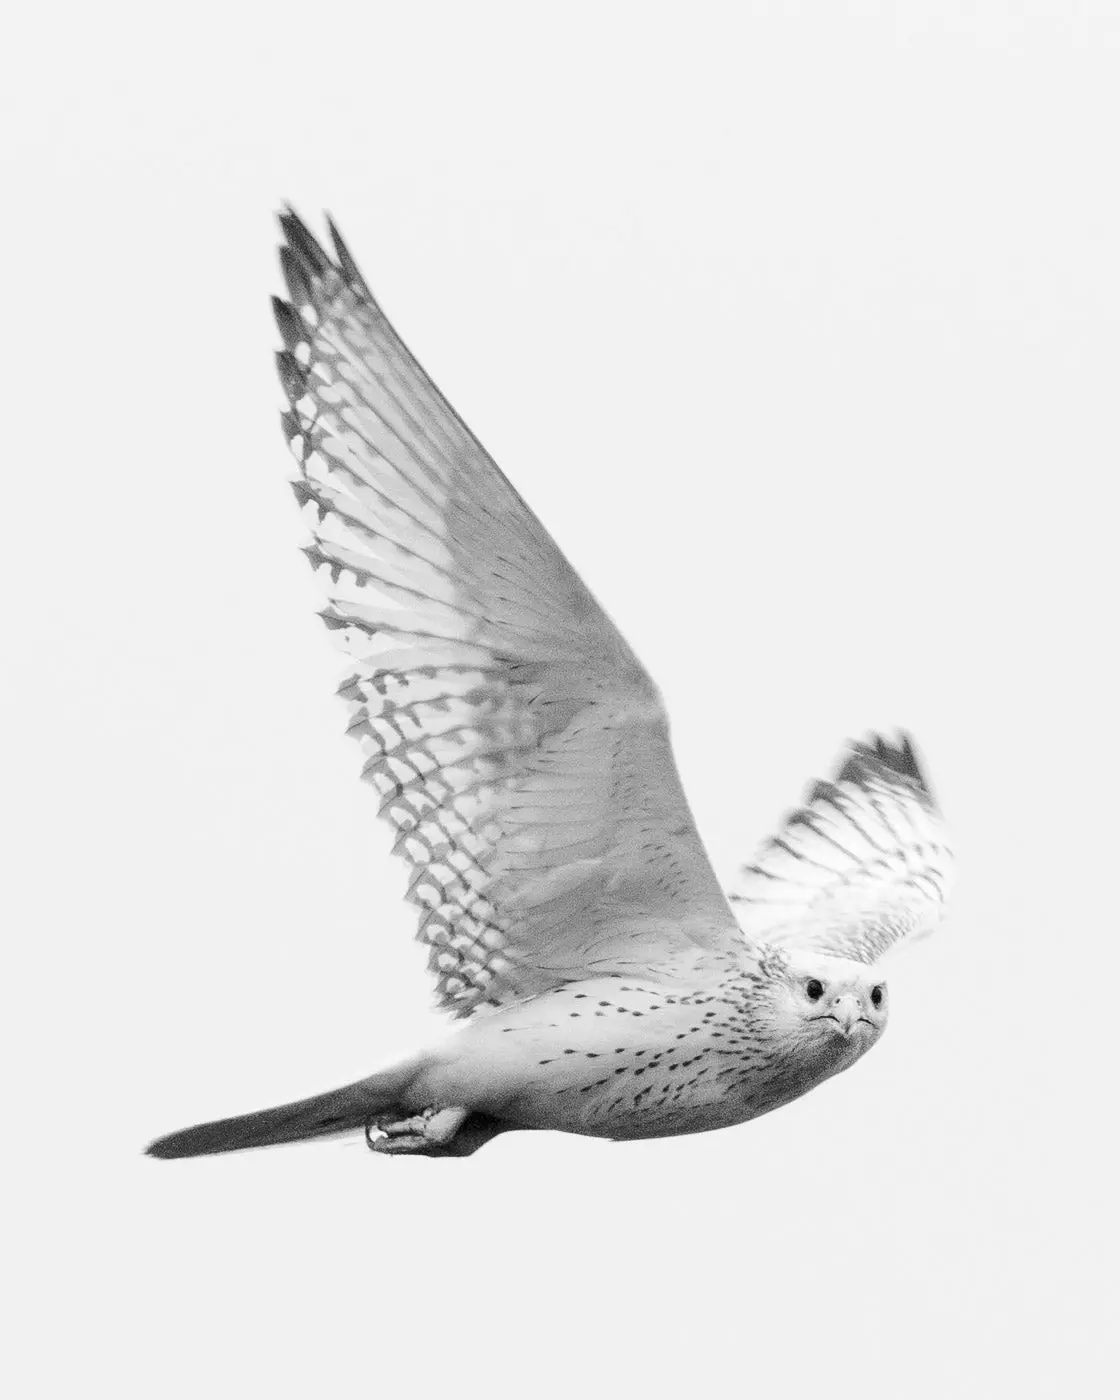
This gyrfalcon flew overhead, and I snapped a few frames before she vanished. Sure, it would’ve been nice to switch to an 800 mm lens with a 2x extender, but the gyrfalcon was present for literally just seconds. (I suppose a bigger problem is that I don’t have any of that exotic gear!) With “only” a 400 mm lens on a 1.6x camera body, I ended up with an uncropped image like this:

This is one of my favorite bird photos, but due to the capture circumstances described above, the cropped file is a mere 2.5 megapixels. That’s where Super Resolution comes in — I now have a 10-megapixel image from which I can make a decent sized print. Used in this way, Super Resolution is like having an advanced “digital zoom” capability.
Now that we’ve talked about some of the potential use cases for Super Resolution, let’s take a closer look at the underlying tech.
How does it work?
Michaël Gharbi and Richard Zhang of Adobe Research developed the core technology behind Super Resolution.
The idea is to train a computer using a large set of example photos. Specifically, we used millions of pairs of low-resolution and high-resolution image patches so that the computer can figure out how to upsize low-resolution images. Here’s what some of them look like:

These are small 128 x 128-pixel crops from detailed regions of real photos. Flowers and fabrics. Trees and branches. Bricks and roof tiles. With enough examples covering all kinds of subject matter, the model eventually learns to up sample real photos in a naturally detailed manner.
Teaching a computer to perform a task may sound complicated, but in some ways it’s similar to teaching a child — provide some structure and enough examples, and before long they’re doing it on their own. In the case of Super Resolution, the basic structure is called a “deep convolutional neural network,” a fancy way of saying that what happens to a pixel depends on the pixels immediately around it. In other words, to understand how to up sample a given pixel, the computer needs some context, which it gets by analyzing the surrounding pixels. It’s much like how, as humans, seeing how a word is used in a sentence helps us to understand the meaning of that word.
Training a machine learning model is a computationally intensive process and can take days or even weeks. Here’s a visual walkthrough of what progress looks like, starting from a Fujifilm X-Trans raw pattern of a scene:

An example training pair: The X-Trans input patch (left) and enlarged RGB color output patch (right). The model is trying to learn the correspondence between the two. The image on the right is called the “reference” or “ground truth” image.
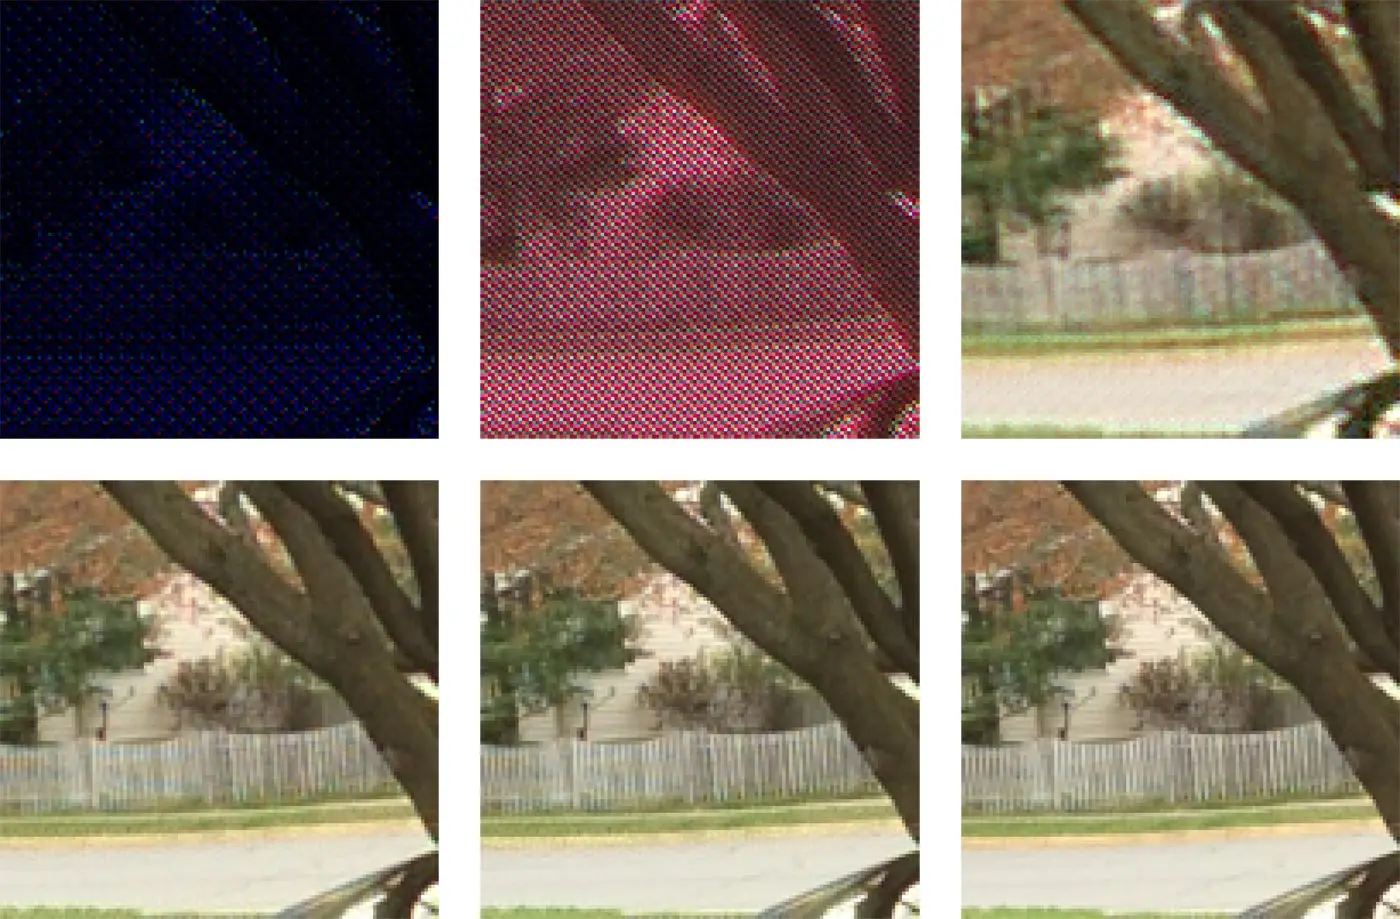
Six snapshots of training progress, from beginning (top left) to end (bottom right).
You can see how the initial results (top left and top center) are comically bad — they don’t even look remotely like photographs! That’s what happens at the very beginning, when training is just getting started. Just like how a child doesn’t learn to walk on day one, machine learning models don’t immediately figure out how to demosaic and upsize cleanly. With more training rounds, though, the model rapidly improves. The final result (bottom right) looks quite similar to the reference image.

Ground truth (left) vs fully-trained model (right). Pretty close, right?
We have a few unique ingredients in our training regimen for Super Resolution. One of them is that for Bayer and X-Trans raw files (used by the vast majority of camera models), we train directly from the raw data, which enables us to optimize the end-to-end quality. In other words, when you apply Super Resolution to a raw file, you’re also getting the Enhance Details goodness as part of the deal. A second key piece is that we focused our training efforts on “challenging” examples — image areas with lots of texture and tiny details, which are often susceptible to artifacts after being resized. Finally, we built our machine learning models to take full advantage of the latest platform technologies, such as CoreML and Windows ML. Using these technologies enables our models to run at full speed on modern graphics processors (GPUs).

How do I use it?
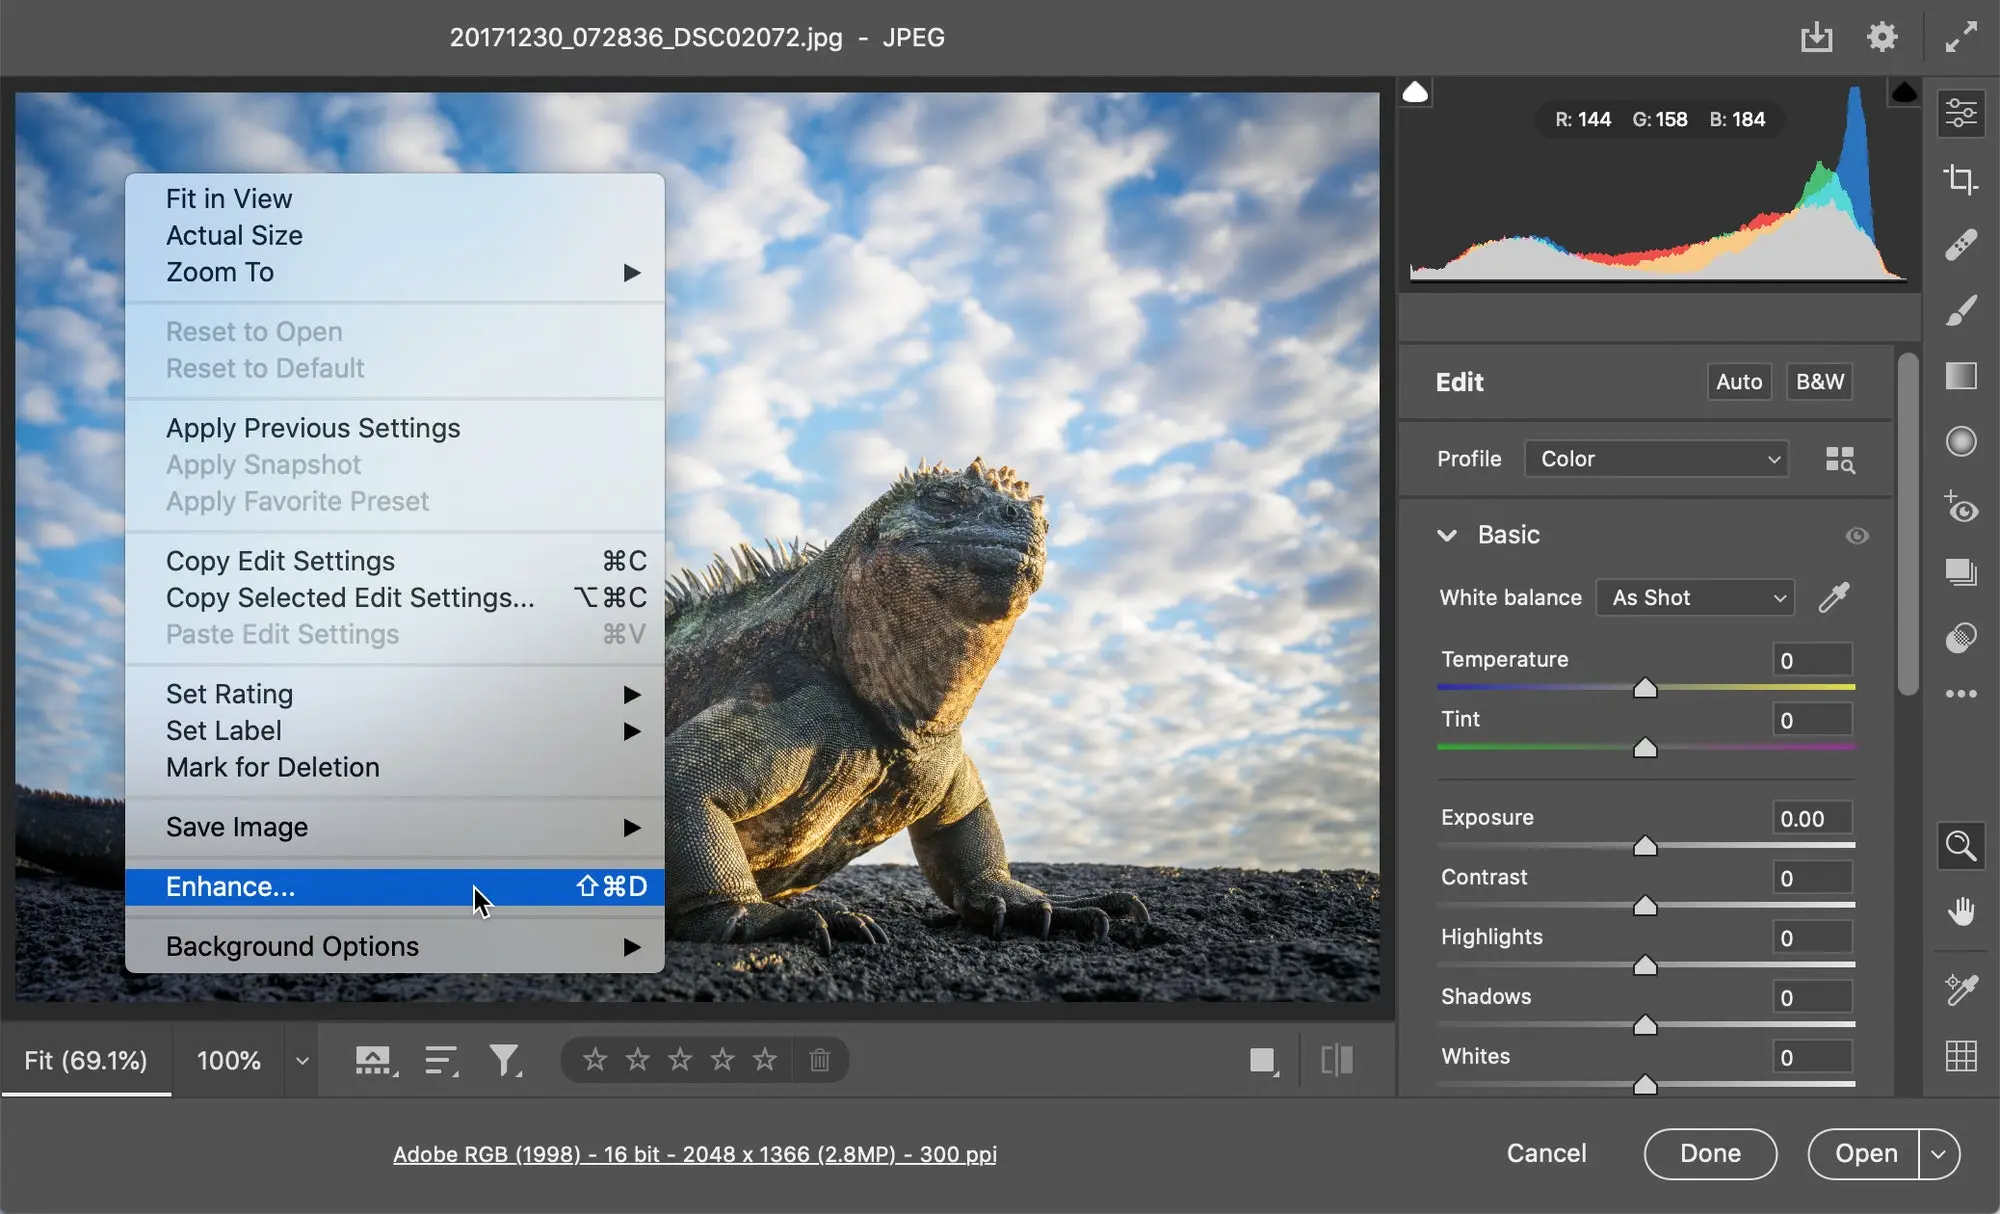
Using Super Resolution is easy — right-click on a photo (or hold the Control key while clicking normally) and choose “Enhance…” from the context menu. In the Enhance Preview dialog box, check the Super Resolution box and press Enhance.
Your computer will put on its thinking cap, crunch a lot of numbers, then produce a new raw file in the Digital Negative (DNG) format that contains the enhanced photo. Any adjustments you made to the source photo will automatically be carried over to the enhanced DNG. You can edit the enhanced DNG just like any other photo, applying your favorite adjustments or presets. Speaking of editing, I recommend taking another look at your Sharpening, Noise Reduction, and possibly Texture settings. All of these controls affect fine details, and you may need to tune these for best results on the enhanced photo.
Super Resolution doubles the linear resolution of the photo. This means that the result will have twice the width and twice the height of the original photo, or four times the total pixel count. For instance, the following source photo is 16 megapixels, so applying Super Resolution will result in a 64 megapixel DNG.

Images are currently limited to 65000 pixels on the long side and 500 megapixels. If you try to apply Super Resolution to a file that’s close to those numbers, like a big panorama, you’ll get an error message because the result would be too large. We’re looking into ways to raise these limits in the future. For now, don’t get too worried — a 500-megapixel file is still pretty darn big!
Applying Super Resolution to a Bayer or X-Trans raw file will automatically apply Enhance Details, too. Combining these steps results in higher quality and better performance.
Super Resolution also works on other file formats such as JPEGs, PNGs, and TIFFs. Here’s an example where I captured a time-lapse sequence in raw format, then composited them in Photoshop to produce a TIFF file. I then applied Super Resolution to this composite.

If you use Enhance a lot, you may find the following tips handy to speed up your workflow. You can apply Enhance to several images at a time by first selecting the desired images in the filmstrip, then running the Enhance command. The dialog will only show you a preview for the primary photo, but your chosen Enhance options will apply to all selected photos. You can also skip the dialog entirely by pressing the Option (on macOS) or Alt (on Windows) key before picking the Enhance menu command. Using this “headless” option will apply the previous Enhance settings.
Comparison
Let’s take a closer look at the results. We’ll start with a studio test scene available at dpreview.com:

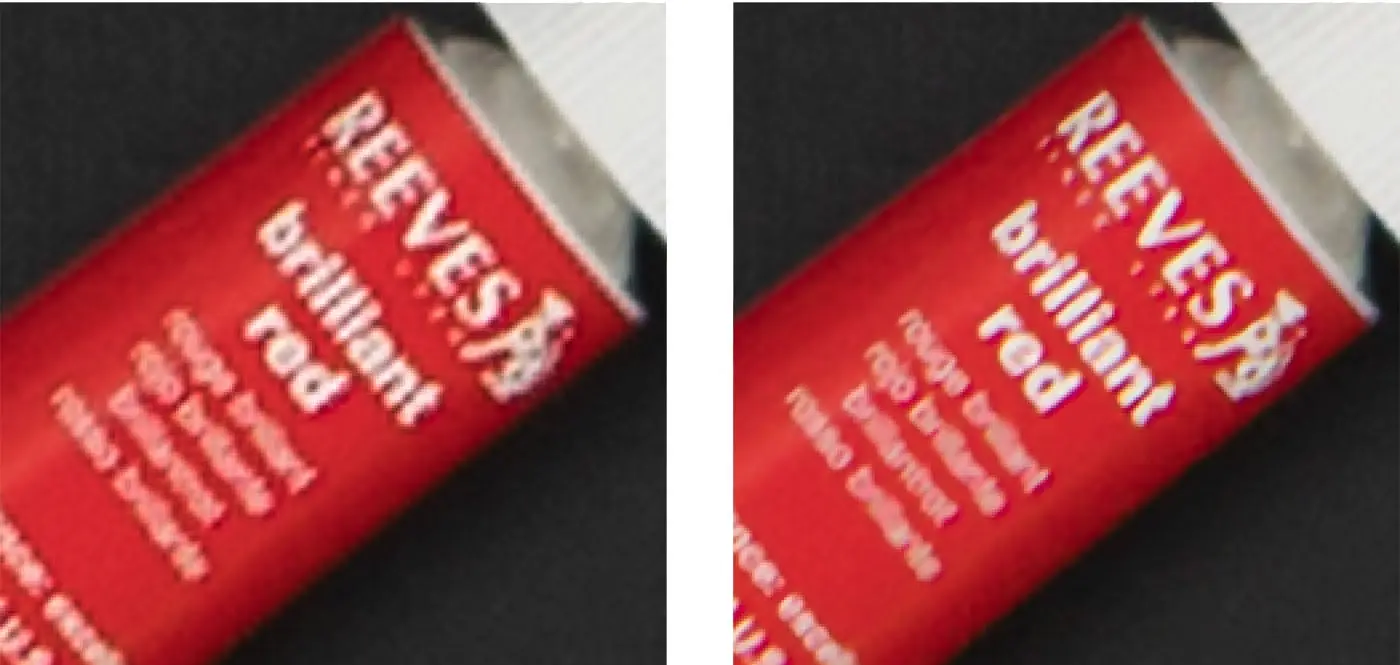
While this is obviously not a “real-world photograph,” it is a good way to get a sense of the benefits provided by Super Resolution over traditional upsizing methods. Here are some zoomed-in crops from various parts of this test scene. Images on the left use standard bicubic upsizing, and images on the right use Super Resolution. Notice how the new approach does a better job at preserving small details and colors.


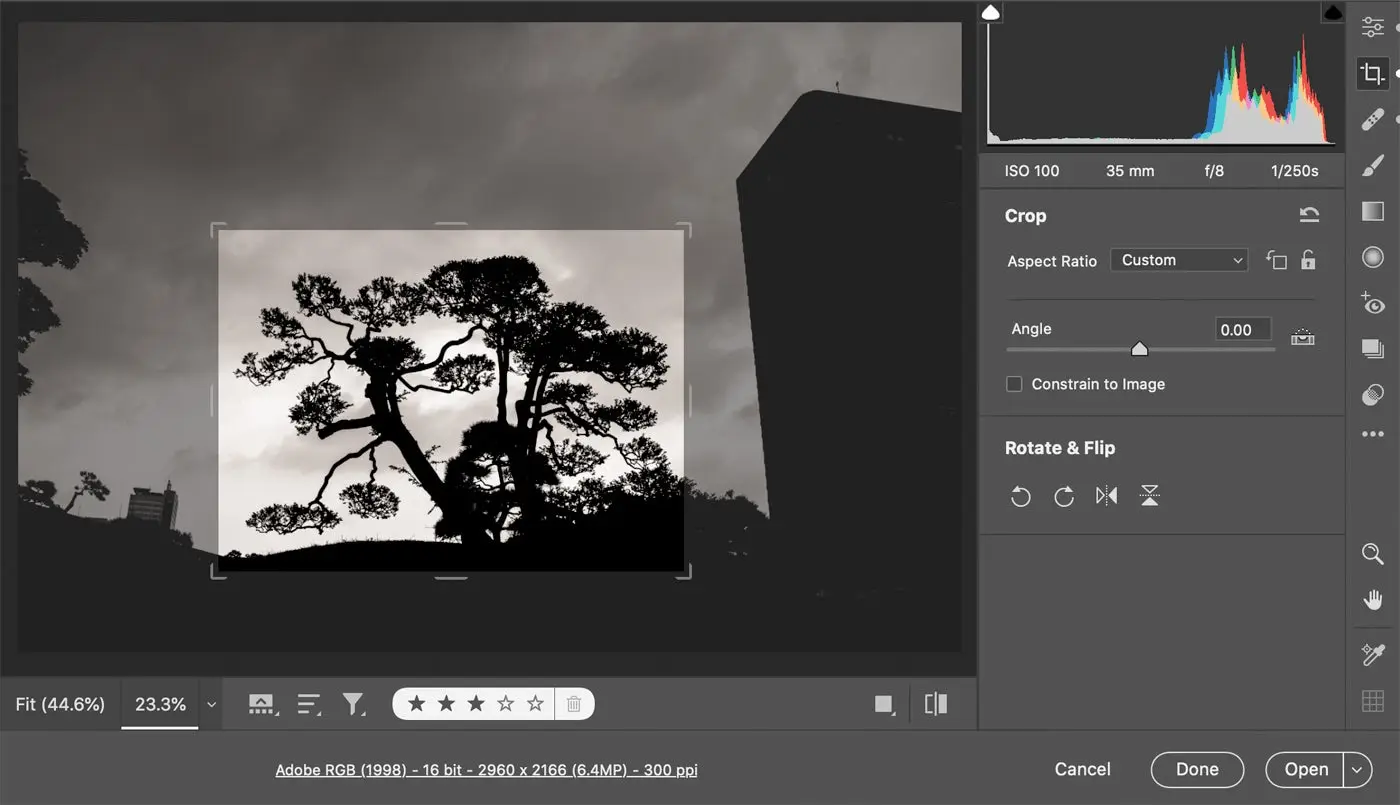
Now let’s examine some practical cases, starting with a landscape image
This is actually a fairly tight crop from a larger scene, as shown below:
Here is a side-by-side zoomed in view of the branches and foliage, with bicubic resampling on the left and Super Resolution on the right:

While we’re on the super theme, here’s a photo of Super Bear:
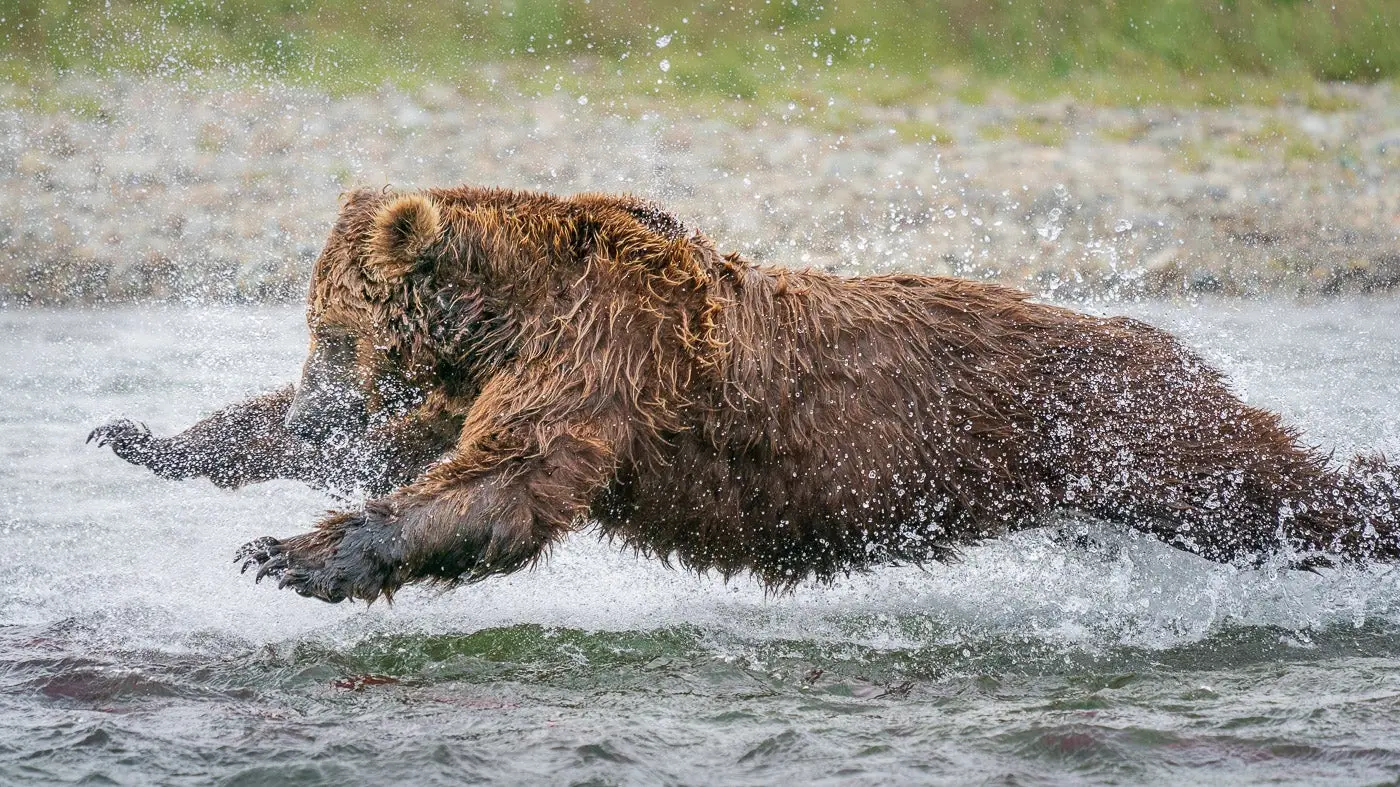
All that’s missing is a red cape!
I kept my distance from this brown bear as she fished for sockeye salmon. (Coming between a hungry bear and her lunch is a Very Bad Idea.) Here are closeups of the fur and spraying water, with bicubic resampling on the left and Super Resolution on the right.

Best practices
Here are some additional tips for getting the most out of Super Resolution.
Use raw files whenever possible. More generally, start from the cleanest source photo available. If the source photo has artifacts, as often happens with highly compressed JPEGs or HEIC files, then these artifacts might become more visible after applying Super Resolution.
A faster GPU means faster results. Both Enhance Details and Super Resolution perform millions of calculations and benefit immensely from a fast GPU. For laptop owners, an external GPU (eGPU) can make a big difference. We’re talking about seconds vs minutes to process a single image!

If you’re in the market for a new computer or GPU, look for GPU models optimized for CoreML and Windows ML machine learning technologies. For example, the Neural Engine in the Apple M1 chip is highly tuned for CoreML performance. Similarly, the TensorCores in NVIDIA’s RTX series of GPUs run Windows ML very efficiently. The GPU landscape is changing quickly and I expect big performance improvements around the corner.
Super Resolution can produce very large files, which take longer to read from disk. I recommended using a fast drive like a Solid-State Drive, or SSD.
Finally, don’t feel that you need to apply Super Resolution on all your photos! Think of it as a new option for those special photos and print projects that really need it. As for myself, I have a hundred thousand photos in my catalog, but I’ve used Super Resolution on just a handful of them. After long and careful consideration, I decided that I really don’t need a hundred megapixel photos of my cat. Really.
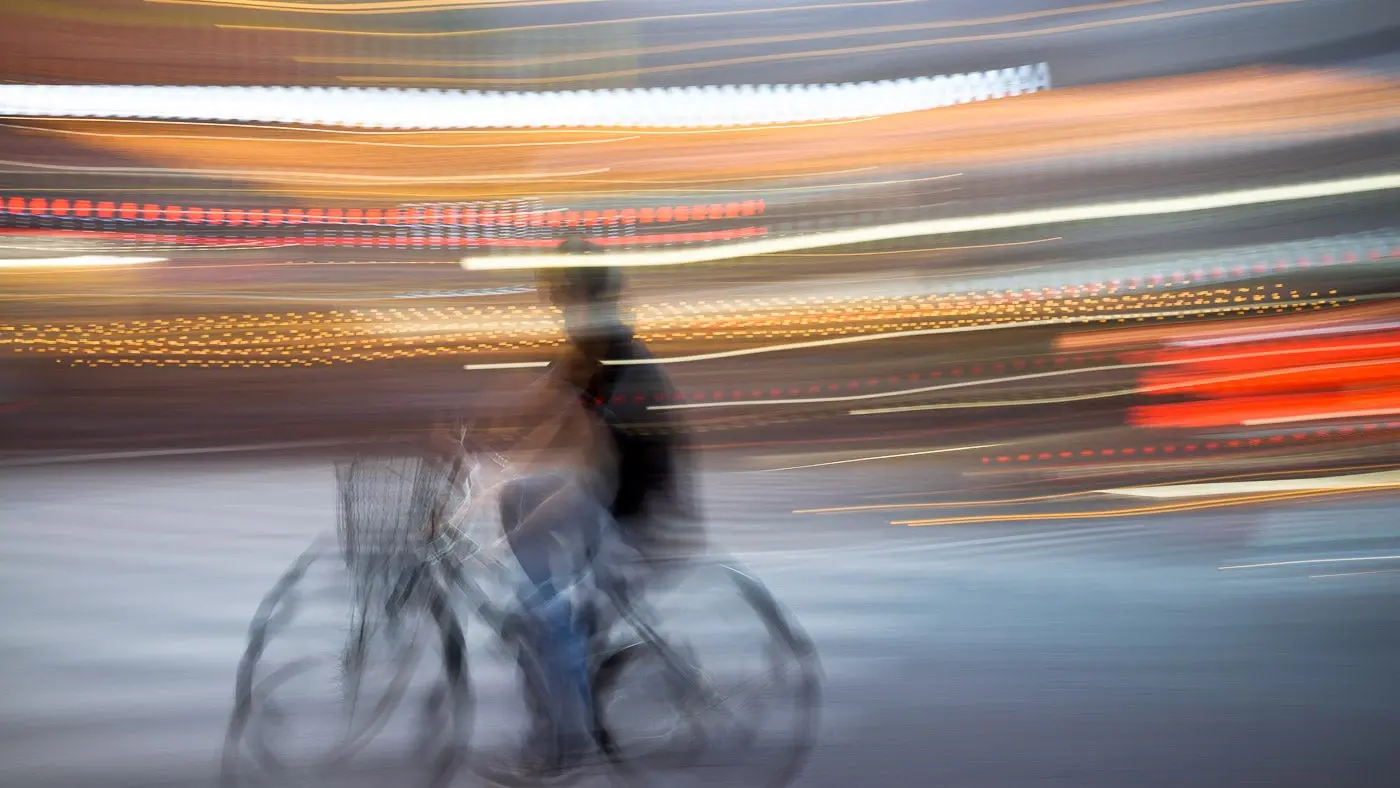
This pan-blur photo doesn’t have any fine details and doesn’t need Super Resolution, even when making a big print.
What’s next?
Enhance Details was the first Enhance feature. Super Resolution is the second. We’re now looking into ways to extend Super Resolution to produce even larger and cleaner results. We’ll also be exploring other potential applications of the same underlying technology, such as improved sharpening or noise reduction. Anything we can do to make images look better is fair game!
Source : Adobe